
HTML ( Hypertext Markup Language) and CSS (Cascading Style Sheets) are core technologies for building Web pages.
- In fact, HTML uses a tag-based structure that is easy to understand even without technical experience. CSS adds styling such as fonts, colors, or layouts to your website, making the website more aesthetically pleasing.
- So, As fundamental web development languages, HTML and CSS are great ways to start development.
- We can start learning coding development with the help of HTML. Already he teaches how to put elements and tags to structure a web document.
- HTML is a web-based language that tells your browser how to showcase text and images on a webpage. You use tags to indicate the various elements, determine the placement of paragraphs and headings, and add images and videos.
- HTML can help you learn other coding languages more easily.
- We should also look at how to get started with HTML and CSS. And if you are an IT student, you must have come to study. Because in many courses, HTML and CSS have been added to the basic course in the starting phase. Both are very easy to learn and understand.
- First of all, we have to go to the official site of HTML. https://html.com/.
- It is very simple and easy to explain right from the beginning. How will it run from the history of HTML, where can you use the text editor? All such details are given by it.
- Let us also see a small demo of the HTML code.
<!DOCTYPE html>
<html lang="en">
<head>
    <meta charset="UTF-8">
    <meta name="viewport" content="width=device-width, initial-scale=1.0">
    <title>Document</title>
</head>
<body>
    <h1> Hello </h1>
</body>
</html>
- In the above code, you will see that first a basic html structure is created. <html><head><body> These are the basic and main tags that are used to create the simple structure of HTML first.
- Then the <meta> and <title> tag which is written in the <head> tag, if we understand the meta tag in plain language, it is a tag for SEO of the site. The <Title> tag is used for the name shown in the tab on the site.
- After that, if you see that <h1> tag is used, it shows the data written in it as Heading. By using many such tags, we can show our code more neatly and systematically.
- We should also add CSS in the above code.
<!DOCTYPE html>
<html lang="en">
<head>
    <meta charset="UTF-8">
    <meta name="viewport" content="width=device-width, initial-scale=1.0">
    <title>Document</title>
</head>
<body>
    <h1 style="color: red"> Hello </h1>
</body>
</html>
- You can change the font color by using the color property. And very easily you can make the site attractive with CSS properties.
- Let's see its output.
- once more, should add more background color.
<!DOCTYPE html>
<html lang="en">
<head>
    <meta charset="UTF-8">
    <meta name="viewport" content="width=device-width, initial-scale=1.0">
    <title>Document</title>
</head>
<body>
    <h1 style="color: red; background-color:rgb(68, 212, 200);"> Hello </h1>
</body>
</html>
- Added background-color property and direct background color change is done. In this way, CSS can be added very easily.
- Let's see its output.
- By understanding HTML and CSS, you will soon be able to get a grasp on other technologies much more quickly and easily, these include JavaScript, PHP, SQL, and Python.
- If you’re looking to start a new career in the tech world, understanding how different languages work to develop your skills is necessary. These languages currently power the internet and your favorite websites from Netflix to Google and Facebook all use HTML and CSS, so you will have no trouble finding a company that can utilize your skills. Even if you’re not ready for a career change, skilling yourself with HTML & CSS can provide you with an additional source of income These skills are currently growing in demand, and investing in them now can benefit you in the long run.
HTML, CSS
October 06, 2023


React is a JavaScript library. It helps to build user interfaces. React is a flexible open-source, efficient, and declarative, JavaScript library. Using it we can build simple, fast, and scalable frontends of web applications.
It's created by Facebook. The developer who created it was Jordan Walke. It was first used in 2011 for Facebook's Newsfeed feature.
It is one such popular front-end development framework that is breaking records in the web development space.
Some notable React projects include Facebook, Instagram, Netflix, Tesla, Skype, Shopify, Discord, Uber, Walmart, and Airbnb.
Today, over 220,000 live websites are using React. Further giants industry like Apple, Netflix, Paypal, and many others have also already started using React JS in their software productions.
The best benefits of ReactJS for use in front-end development
Performance
- It creates a virtual DOM in memory. React detects what changes have been made, and makes only the changes that need to be made.
Speed
- React allows developers to utilize individual parts of their application on both the client side and the server side, which ultimately boosts the speed of the development process.
- And React finds out what changes have been made, and changes only what needs to be changed.
Reusable Components
- One of the main benefits of using React JS is the reuse of components. The code written once can be used again. It saves time for developers.
- And, if any changes are made in any particular part, it will not affect other parts of the application.
It offers better code stability
- React follows a downward data flow. It ensures that the parent structure is not affected by any modifications in its child structure.
- This approach ensures that only the component affected by a change will undergo an update. This data structure provides better code stability and smooth performance of the application.
The latest survey by Stack Overflow
Stack Overflow trends
Let's see the React version History
Version Release Date
0.3.0 29 May 2013
0.4.0 20 July 2013
0.5.0 20 Oct 2013
0.8.0 20 Dec 2013
0.9.0 20 Feb 2014
0.10.0 21 Mar 2014
0.12.0 21 Nov 2014
0.13.0 10 Mar 2015
0.14.1 29 Oct 2015
15.0.0 07 Apr 2016
15.1.0 20 May 2016
15.2.0 01 July 2016
15.3.0 30 July 2016
15.3.1 19 Aug 2016
15.4.0 16 Nov 2016
15.4.1 23 Nov 2016
15.4.2 06 Jan 2017
15.5.4 11 Apr 2017
15.6.0 13 June 2013
16.0.0 26 Sep 2017
16.1.0 09 Nov 2017
16.3.0 29 Mar 2018
16.3.1 03 Apr 2018
16.3.2 16 Apr 2018
16.4.0 24 May 2018
16.5.0 05 Sep 2018
16.6.0 23 Oct 2018
16.7.0 20 Dec 2018
16.8.0 06 Feb 2019
16.8.6 27 Mar 2019
16.9.0 09 Aug 2019
16.10.0 27 Sep 2019
16.10.1 28 Sep 2019
16.10.2 03 Oct 2019
16.11.0 22 Oct 2019
16.12.0 14 Nov 2019
16.13.0 26 Feb 2020
16.13.1 19 Mar 2020
16.14.0 14 Oct 2020
17.0.0 20 Oct 2020
17.0.1 22 Oct 2020
17.0.2 22 Mar 2021
17.0.3 29 Apr 2021
17.0.4 14 May 2021
17.0.5 27 May 2021
17.0.6 27 May 2021
17.0.7 17 Jan 2021
17.0.8 01 Jul 2021
17.0.9 27 Jul 2021
17.0.10 30 Sep 2021
17.0.11 19 Oct 2021
17.0.12 22 Dec 2021
17.0.13 20 Jan 2022
17.0.14 24 Feb 2022
17.0.15 31 Mar 2022
17.0.16 07 Jan 2022
17.0.17 19 Jul 2022
17.0.18 23 Aug 2022
17.0.19 04 Oct 2022
17.0.20 24 Nov 2022
17.0.21 20 Dec 2022
18.0.0 18 Jan 2023
18.0.1 22 Feb 2023
18.0.2 29 Mar 2023
18.0.3 10 May 2023
18.0.4 21 Jun 2023
18.0.5 02 Aug 2023
18.0.6 13 Sep 2023
18.0.7 25 Oct 2023
18.0.8 06 Dec 2023
ReactJs
October 06, 2023

Function Component and Class Component both are Components of React. Components are the heart of React. Components codes we can use many times. Those are independents. Components are basic building blocks of React, and they represent classes or functions that accept input and render the various HTML elements. The best use is we can write in this HTML. It uses JSX to write HTML in React. It is known as JavaScript XML and also known as JavaScript Syntax Extension. It makes the work of developers easier. If you want to get more information on JSX then you can visit our blog Introduction of JSX.
Let's First get the Function Component and Class Component basic information. First, we need to know what the Class component is and what the Function component is.
1) Class Component
Class Components are JavaScript classes that extend React. Component class. They have more capabilities and more features compared to the Function Component. It easily manages the internal state and handles user events.
2) Function Component
Function Component is a simple function of JavaScript. It takes props as an argument and returns React elements. They are easy compared to Class Components. And also faster to render. If the function component was weak compared to the class component, hooks were created to make it strong. With the help of which function component class can work like a component.
Let's Discuss why the Function Component is over the Class Component.
Less Code:
In the Function Component need to write less code compared to the Class Component. A function component contains code that is easy to understand. So we can understand it easily.
Simplicity:
Function Component is simpler. As we can see above, it has an easily understandable code.
Performance:
The function Component is faster compared to the Class Component.
State Management:
Class components support state management. but function components do not support state management. so, React provides a hook, useState() for the function components to maintain its state.
Hooks:
The class component had more capabilities than the function component but hooks were used to make the function component powerful. Now all the work can be done from the function component, which was done only from the class component earlier.
Life cycle:
Class components have a life cycle. The function component does not have a life cycle. Again, React provides a hook, useEffect() for the function component to access different stages of the component.
Rules for using both Components
must be written in the Component's names of the first word in Upper case.
Lets, we can see the basic syntax examples of both components.
Creating class-based components
class Demo extends React.Component {
    render()
    {
         return <h1> Hello World</h1>
    }
}
Creating function-based components
function Demo(props){
     return <h1> Hello World</h1>
}
In the above example, The first is a class component and the second one is a function component example. I am taking the same name Demo for both functions. I'm writing Demo's First word in capital. That is the right rule for components. If we write the first word of the element in lowercase, it throws an error.
This keyword inside the constructor function refers to an object that consists of all the properties and methods declared using this keyword.
function component syntax is based on simple javascript syntax.
Advantages of Function Components
1. Function Components are easy to understand.
2. Function Components have less code compared to class components.
3. Function Components did not use the render method but the class is used.
4. Function Components use hooks.
React version 18 provides 15 hooks for developers
- useCallback
- useContext
- useDebugValue
- useDeferredValue
- useEffect
- useId
- useImperativeHandle
- useInsertionEffect
- useLayoutEffect
- useMemo
- useReducer
- useRef
- useState
- useSyncExternalStore
- useTransition
ReactJs
October 06, 2023

If you are a web developer, you might have heard of webpack, a static module bundler that can help you optimize and automate your web development workflow. But what is webpack, and how does it work? In this blog, I will explain the main concepts and features of webpack, and show you how to use it for your web projects. By the end of this blog, you will have a better understanding of webpack, and how to use it to create faster, more efficient, and more reliable web applications.
Webpack is a static module bundler. It is an open-source module bundler. It's used to compile JavaScript modules. Which combines the required modules of the project into one or more bundles. It was created primarily for JavaScript. But can transform front-end assets such as HTML, CSS, etc.
It was initially released on 19 February 2014 and a stable release on 1 April 2022 with version 5.71.0. The official website is webpack.js.org.
Webpack takes modules with dependencies and generates static assets. Webpack understands only JavaScript and JSON.
Webpack treats all files and assets(fonts, images…) as a module. It creates a dependency graph. A dependency graph describes how modules are related to each other using between files. It combines all the modules to form a bundle.
In this configuration file named is webpack.configure.js. This file describes how files should be converted? And what type of output should be generated?
let's see the webpack.configuration.js file example.
module.exports = {
  entry: './pathname',
  output: {
       path: './dist',
       filename: '[name].min.js',
  },
  plugins: [
       new webpack.optimize.UglifyJsPlugin()
  ],
  module: {
       rules: [{
         test: /\.js$/.
         exclude: [/node_modules/],
         use: {
            loader: 'babel-loader',
            options: {
              presets: ['es2020']
            }
         }
       }]
   }
};
Webpack starts working from an entry point. Like ./src/index.js. It sees which modules and libraries depend on the entry point. Check one by one and define it in the graph.
Webpack understands only JavaScript and JSON so It uses a Webpack loader to load and understand other files. It converts which JavaScript and JSON files are not.
Plugins help to find solution bundle minimization, optimization, and asset management. Webpack's main property is output. Webpack suggests where to extract the bundle.
The default value for this property is ./dist/main.js for the main bundle.-x
Webpack gives two modes: 1) Development mode and 2) Production mode
Webpack also provides a built-in development server, It also uses Hot Module Replacement (HMR) that updates code on a webpage without requiring the developer to reload the page.
Node.js is required for using Webpack.
Node.js and webpack both are different tools that can work together to create web applications. Node.js can run JavaScript code outside the browser, such as on a server or a desktop. Webpack can take JavaScript modules and bundle them into a single file that can run in the browser. Webpack can help Node.js developers optimize their code for the web.
Webpack can Transpile JavaScript code to make it compatible with older browsers. That can minify and compress JavaScript code to reduce its size and improve performance. It can manage dependencies and resolve conflicts between different versions of modules.
In Short,
Webpack is a powerful tool that can help you manage your web development projects. It allows you to bundle your JavaScript modules and other assets into static files that can be easily deployed and consumed by browsers. It also provides various features and plugins that can help you improve your code quality, performance, and productivity. Webpack is widely used and supported by the web development community, and it has rich documentation and an ecosystem.
Webpack is a very powerful tool. I explained only the core concept but Webpack gives more features.
NodeJs, ReactJs
October 06, 2023

Socket.IO was created by Guillermo Reach in 2010. It was developed to use open connections to facilitate real-time communication, which was still a relatively new phenomenon. That is written in JavaScript. That official website is socket.io and the repository of GitHub is https://github.com/socketio/socket.io.
Let you understand Socket.IO in very simple language. We people must have used chat applications. Let's take an example WhatsApp. If you message someone in it, it gives you a real-time experience. In which someone messages from the front. So it shows you this message at the same time (typing...). And if it sends a message, you don't have to refresh the page and it will show you the message directly.
Let's understand this topic technically. When the first user is typing something then the second user should know that the first user is typing (similar to gtalk of Facebook messenger). If you use HTTP calls then the second person will never be able to see the actual status of the other person because of the delay. When we use sockets so that when the first user is typing anything his device will send only one data packet which will just notify the server that he is typing and will be delivered to the second user, this process is fast and almost real-time and will reduce the data transfer also.
This is an event-driven library. They are two parts: first, a client-side library that runs in the browser, and second a server-side library for Node.js.
Socket.IO allows bi-directional communication between client and server.
That establishes the connection, and exchanges data between the client and server, Socket.IO uses Engine.IO. This is a lower-level implementation that is used under the hood. Engine.IO-client is used for the client implementation and Engine.IO is used for the server implementation.Socket.IO also has a large community, Due to this, it is quite easy for us to find help.
Most real-time systems are architected with the help of sockets. It provides a bi-directional communication channel between the server and the client. The server can send a message to the client and the client can also send messages to the server.
Socket.IO is very popular. That is used many organizations use to build robust real-time systems like Zendesk, Microsoft Office, Trello, and many more organizations. It is one of the most powerful JavaScript frameworks on GitHub, and the most depended-upon NPM (Node Package Manager) module.
Using Socket.io which type of applications can be created?
1) Instant Messengers:
These are the applications that you don't need to refresh if a new message comes. In that way, the message comes without refreshing. Such applications are called instant messenger apps. Many of them are taken by us in regular use. Like WhatsApp, Discord, WhatsApp Business, Facebook Messenger, WeChat, Snapchat, ShareChat, Google Chat, and Slack, ... there are many applications.
2) Instant Notifications:
This is the type of app where you will get instant notification if someone tags you. ex., Discord, Instagram, Facebook, etc...
3) Collaboration Applications:
Collaboration Applications are allowed to add and update to the same document at the same time by different users. And applications are allowed them. Due to this, many tasks become easy. It also saves time. Google Meet, Google Docs, Asana, ClickUp, Slack, Trello, Skype, and many more applications are included in Collaboration Applications.
4) Multiplayer Gaming:
Online gaming applications are those applications that help to establish bi-directional communication between multiple users. Examples of real-time online games are Chess, Call of Duty, Among Us, League of Legends, GTA Online, etc.
In this way, we can create real-time, user-friendly, and beautiful applications using Socket.IO.
ReactJs
October 06, 2023

It is known as JavaScript XML and also known as JavaScript Syntax Extension.
Its main benefit is it allows us to write HTML in React. JSX is an extension of JavaScript. It's based on ECMAScript 2015(ES6). It is faster than regular JavaScript. We can write HTML code easily in React and it gives more functionality of JavaScript. It comes with the full power of JavaScript in a simple language.
JSX was introduced by React in 2023. Over time, JSX has become a fundamental part of React's approach to building user interfaces. It reduces development time.
JSX is easy for developers but browsers can't understand JSX. In short, at that time new questions arise. JSX is not part of JavaScript? How does JSX work in React if the browser doesn't understand JSX? How JSX is compiled? How does it work simply in react?
Babel solves all these questions. It's a JavaScript Compiler. It helps to convert the ECMAScript 2015+ version's code into core JavaScript.
So how has it helped us with JSX?
In JSX Babel converts HTML code in core Javascript. So, the browser easily understands core JavaScript. And our JSX code easily compiles and runs. A big confusing task becomes easy with the help of Babel.
With its help, the developer's work became very easy and fast.
Let's take some examples,
return (
				<h1> This is Example of JSX </h1>
		)
We can write CSS in JSX code and make our website interactive.
<div className="testmonial">
  <p> This is Example of JSX with CSS</p>
</div>
Another big benefit of JSX is we can write JavaScript expressions in JSX. Let's understand it through an example.
return(
        <div> { 5 + 5 } </div>
      )
Hear, used {} (curly braces ) for JavaScript expressions. Using them easily write expressions in JSX. And it returns the answers. In the above example, it returns 10 in Output. It easily worked.
We can also use conditional expressions in JSX, yes, we can use if else statements in JSX but JSX can't support if else syntax. instead of an if-else statement, we can use the ternary operator in JSX. Let's take a simple example of a ternary operator in JSX.
const Demo = () => {
   const num = 5;
   return (
     <div>
       <h1>{ num === 5 ? 'true' : 'false' }</h1>
     </div>
   );
}
num === 5 is checked as the correct value. if this condition returns true then it returns true otherwise returns false. In the above example, it returns true in the answer. You can see that everything is done smoothly and easily.
One important thing, you need your JSX code wrapped in an enclosing tag.
return(
        <div>One</div>
        <div>Two</div>
        <div>Three</div>
      )
The above example Is not good for writing in JSX code. Let's revise and rewrite it.
return(
        <div>
        <div>One</div>
        <div>Two</div>
        <div>Three</div>
        </div>
      )
Otherwise, you can use opening <> and closing </> tag. This is the best solution for wrapping tags. Let's see how to use the opening and closing tags in JSX.
return(
        <>
            <section>
              <div>One</div>
              <div>Two</div>
            </section>
            <div>
              <img src="image-path" alt="" />
            </div>
         </>
       )
It is not mandatory to use JSX, we can also use JavaScript instead. But due to that, the code becomes lengthy and also seems complicated.
we can see that the above code of JSX is trying to convert into pure JavaScript.
React.createElement(React. Fragment, null, React.createElement("section", null, React.createElement("div", null, "One"), /React.createElement("div", null, "Two")), React.createElement("div", null, React.createElement("img", { src: "image-path", alt: "" })));
This seems very difficult to understand and writing is also difficult. So, JSX is very helpful to write in React and it's easy to understand.
ReactJs, JavaScript
October 06, 2023

If you are a web developer, you might have heard the terms "production ready" and "build" before. But what do they mean, and how are they different? In this blog, I will explain the meaning and importance of production-ready and build, and compare and contrast the different types of build processes. By the end of this blog, you will have a better understanding of production-ready and build, and how to use them in your web development projects.
In little projects, developers will often manually create the build process.
This process is very difficult for large projects. then it is very hard to keep track of what needs to be built, in what sequence, and what dependencies there are in the building process. Taking the help of an automation tool allows the build process to be more consistent.
Production-Ready
Production-ready code means that it is ready to be delivered to the client. It is the process of automating the build of the project. Compiling code and running automated tests. His includes utilities like Gradle, Ant, Make, MSBuild, Maven, etc. Their primary purpose is to compile and link source code.
For example, if you are developing a web application using React, you can use the npm run build command to create a production-ready code. This command will create a build folder in your directory, which contains the optimized and minified version of your code.
Advantages:
Improves Quality-
You can find issues faster and resolve them. So, you can improve your code quality.
Increases Productivity-
In this need less time to manage tools and processes. so, we can give more time to our productivity Because of that it can increase productivity.
Speeds up delivery-
As we can see above, he does not have to spend much time handling and processing the equipment, so our time is saved and therefore we can deliver the project earlier.
Build
The build is a process of compiling our code using build tools and creating a build.
It gives answers in two results. Either your code is ready for production or it has an error.
When your code is ready for production then it returns the Build is Ready message.
Otherwise, you get an error and the build is not created.
There are three types of the build process:
1) Continuous integration build
2) Gated Build
3) Nightly Build
1) Continuous integration build
In this build, a build is created for the latest changes immediately after check-in, so we can check whether the work done after check-in is working or not.
This is preferred for small projects.
The best benefit of this is that a particular check-in is successful or not.
2) Gated Build
This build starts taking changes into the shelve-set immediately after check-in. Thus if the build succeeds the shelve-set check-in is committed otherwise it will not be committed to the server.
3) Nightly Build
These are also known as Scheduled builds. These changes have a fixed time to build. The build is done according to the schedule fixed for that.
Take one example of a building project :
React:
command = npm-run-build
when it's used, it creates a build name folder in your directory.
Let's get some information for that folder and files
Static File :
In this our JavaScript and CSS files are available. In main.[hash].chunk.js
Let's see the difference between Production-ready and Build in a short and sweet sentence.
1) In production ready is The process of automating the build of the project, compiling code, and running automated tests and Build is The process of compiling the code using build tools and creating a build
2) Production-ready is the final result of the build process, ready to be delivered to the client, and build is the intermediate result of the build process, used to check the code quality and functionality
3) In production ready Includes utilities like Gradle, Ant, Make, MSBuild, Maven, etc. Build Includes utilities like Git, GitHub, Jenkins, Travis CI, etc.
4) Production-ready ensures that the code is optimized, minified, and error-free, and build Ensures that the code is up-to-date, consistent, and compatible.
5) Production-ready Improves quality, productivity, and delivery speed, and Build Improves collaboration, integration, and feedback.
ReactJs
October 06, 2023
What is HTML? 🖥️
- HTML (HyperText Markup Language) is the standard language used to create web pages.
- HTML4 was introduced in 1997, and HTML5 was introduced in 2014 as its successor, with many new features and improvements.
HTML5 Doctype and Character Encoding📝
- HTML4 Example:
<!DOCTYPE HTML PUBLIC "-//W3C//DTD HTML 4.01//EN">
<html>
  <head>
    <meta http-equiv="Content-Type" content="text/html; charset=UTF-8">
  </head>
  <body>
    <p>Hello, world!</p>
  </body>
</html>
- HTML5 Example:
<!DOCTYPE html>
<html>
  <head>
    <meta charset="UTF-8">
  </head>
  <body>
    <p>Hello, world!</p>
  </body>
</html>
Media Elements in HTML5 🎥🎵
- Adding Video in HTML5:🎥
<video controls>
  <source src="video.mp4" type="video/mp4">
  Your browser does not support the video tag.
</video>
- Adding Audio in HTML5:🎵
<audio controls>
  <source src="audio.mp3" type="audio/mp3">
  Your browser does not support the audio tag.
</audio>
New Form Elements in HTML5📝
- Example of New Input Types:
<form>
  <label for="email">Email:</label>
  <input type="email" id="email" name="email">
  <label for="birthday">Birthday:</label>
  <input type="date" id="birthday" name="birthday">
  <label for="rating">Rating (1-10):</label>
  <input type="range" id="rating" name="rating" min="1" max="10">
  <input type="submit" value="Submit">
</form>
Semantic Elements in HTML5 🏛️
- HTML4 Structure (Using <div>):
<div id="header">Header Content</div>
<div id="nav">Navigation Links</div>
<div id="content">Main Content</div>
<div id="footer">Footer Content</div>
- HTML5 Structure (Using Semantic Elements):
<header>Header Content</header>
<nav>Navigation Links</nav>
<article>Main Content</article>
<footer>Footer Content</footer>
HTML
September 06, 2024

introduction to HTML Semantic Elements 🌐
What are Semantic Elements?🔍
- Semantic elements in HTML provide meaning to the structure of a web page. They describe the purpose of the content they contain, making it easier for browsers, search engines, and developers to understand the content.
- Two important semantic elements in HTML are <section> and <article>.
The <section> Element📚
- Definition: 📝
- The <section> element represents a standalone section of content within a document. It is typically used to group related content together under a specific theme or purpose.
When to Use <section>: ⌛
- Use <section> when you want to divide your content into thematic groups or segments. Each <section> can have its own heading and can contain various types of content, including text, images, and other elements.
Example:
<section>
  <h2>Introduction to Web Development</h2>
  <p> Web development is the process of building websites and web  applications...</p>
</section>
Explanation: 💬
- In this example, the <section> element is used to group content related to "Introduction to Web Development." This section could be one part of a larger page on web development.
The <article> Element 📰
- Definition: 📝
- The <article> element represents a self-contained, independent piece of content that can stand alone. An article is typically something that could be distributed or republished independently, such as a blog post, news story, or forum post.
When to Use <article>: 📄
- Use <article> when you are dealing with content that could be considered an independent item. This might include blog posts, news articles, product reviews, or any content that makes sense on its own.
Example:
<article>
  <h2>Latest Trends in Web Design</h2>
  <p> Web design trends are constantly evolving, with new styles emerging every year… </p>
</article>
Explanation: 💬
- In this example, the <article> element is used for a blog post about "Latest Trends in Web Design." This content could be read and understood independently of the rest of the page.
Key Differences Between <section> and <article>🆚
Purpose: 🎯
- <section> is used to group related content, often with a thematic or functional focus.
- <article> is used for content that is self-contained and independent, suitable for syndication or sharing.
Structure: 🏗️
- A <section> may contain multiple <article> elements, but not the other way around.
- <article> is typically not divided into smaller thematic groups like <section>.
<section>
  <h2>Web Development Topics</h2>
  <article>
    <h3>HTML Basics</h3>
    <p>HTML is the standard markup language for creating web   pages...</p>
  </article>
  <article>
    <h3>CSS Fundamentals</h3>
    <p>CSS is used to style and layout web pages...</p>
  </article>
</section>
Explanation: 💬
- Here, the <section> groups articles on different web development topics, each represented by an <article> element. The section serves as an overarching container, while each article is self-contained content.
HTML
September 06, 2024
Introduction to HTML Lists📚
What are HTML Lists?
- HTML lists are used to group a set of related items. They help in organizing content in a structured way, making it easier to read and understand.
- There are two main types of lists in HTML: unordered lists (<ul>) and ordered lists (<ol>).
The <ul> Element🔲
Definition:
- The <ul> element is used to create an unordered list, where the list items are not in any particular order. Each item in the list is typically marked with a bullet point.
When to Use <ul>:
- Use <ul> when the order of the items doesn't matter. It is ideal for lists where the sequence is not important, such as a list of ingredients, features, or items.
- Example:
<ul>
  <li>HTML</li>
  <li>CSS</li>
  <li>JavaScript</li>
</ul>
Explanation:
- In this example, the <ul> element is used to create a list of web development languages. Each item in the list is represented by an <li> (list item) element and is marked with a bullet point.
The <ol> Element🔢
- Definition:
- The <ol> element is used to create an ordered list, where the items are presented in a specific sequence. Each item is numbered.
When to Use <ol>:
- Use <ol> when the order of the items is important. This is useful for step-by-step instructions, ranking, or any list where the sequence matters.
<ol>
  <li>Buy Ingredients</li>
  <li>Preheat Oven</li>
  <li>Bake the Cake</li>
</ol>
Explanation:
- In this example, the <ol> element is used to create a list of steps for baking a cake. Each item is numbered, indicating the order in which the steps should be followed.
Key Differences Between <ul> and <ol>🔍
Purpose:
- <ul> is used for unordered lists where the order of items is not important.
- <ol> is used for ordered lists where the sequence of items matters.
Markers:
- <ul> items are typically marked with bullet points.
- <ol> items are marked with numbers by default, though they can also be styled with letters or Roman numerals.
- Example Comparison:
<h3>Unordered List Example:</h3>

<ul>
  <li>Apples</li>
  <li>Bananas</li>
  <li>Oranges</li>
</ul>
<h3>Ordered List Example:</h3>
<ol>
  <li>Wake Up</li>
  <li>Brush Teeth</li>
  <li>Eat Breakfast</li>
</ol>
Explanation:
- The unordered list displays a simple list of fruits with bullet points, while the ordered list presents a morning routine with numbered steps.
HTML
September 06, 2024
Introduction to HTML Text Formatting ✨
What are HTML Text Formatting Tags?
- HTML provides various tags to format text, allowing developers to highlight, emphasize, or structure text in a way that conveys meaning and improves readability.
- Two commonly used tags for emphasizing text are <strong> and <b>.
The <b> Element🅱️
- Definition:
- The <b> element is used to make text bold. It is a stylistic element, meaning it only changes the appearance of the text without adding any additional meaning or importance.
When to Use <b>:
- Use <b> when you want to make text bold purely for visual emphasis, without implying any extra importance or significance.
- Example:
<p>This is <b>bold</b> text.</p>
Explanation:
- In this example, the word "bold" will appear in boldface, but it doesn't carry any semantic meaning; it’s simply visually emphasized.
The <strong> Element 💬
- Definition:
- The <strong> element is used to give text strong importance or emphasis. It not only makes the text bold but also conveys that the content is of greater significance or importance.
When to Use <strong>:
- Use <strong> when you want to emphasize text that carries special importance or that needs to stand out semantically in addition to visually.
- Example:
<p>
  <strong>Warning:</strong> Please read the instructions carefully before proceeding.
</p>
Explanation:
- In this example, "Warning" is not just bolded for emphasis; it also indicates that the content following it is important and should be given special attention
Key Differences Between <b> and <strong>⚖️
Purpose:
- <b> is purely for visual styling, making text bold without implying any additional importance.
- <strong> adds semantic meaning to the text, indicating that the content is important or should be emphasized, in addition to making it bold.
Impact on Accessibility:
- <strong> is more accessible because screen readers and other assistive technologies recognize the importance of the text and may announce it with emphasis. In contrast, <b> is simply a visual change and doesn’t convey extra meaning to assistive technologies.
Example Comparison:
<p>This is <b>bold</b> text for style.</p>
<p><strong>Important:</strong> This text is bold and carries extra meaning.</p>
Explanation:
- The first sentence uses <b> to bold the word "bold" for stylistic purposes, while the second sentence uses <strong> to emphasize "Important," signaling to the reader and assistive technologies that this text carries significant meaning.
HTML
September 06, 2024
Overview📚:
- In HTML, <em> and <i> are both used to style text, but they serve different purposes and convey different meanings. Understanding these differences helps create semantic and accessible web content.
The <em> Element🔠
- Purpose: The <em> tag is used to emphasize text. When text is wrapped in <em>, it signifies that the content is of greater importance or should be stressed.
- Semantic Meaning: <em> is a semantic element. It conveys meaning beyond just appearance. It indicates that the enclosed text should be emphasized, which can be important for accessibility tools like screen readers.
- Default Styling: By default, browsers typically render <em> text in italics. However, the primary role of <em> is semantic rather than purely stylistic.
- Example:
<p>I really <em>love</em> coding.</p>
- In this example, the word "love" is emphasized, indicating that it’s an important part of the sentence.
- Accessibility: Screen readers often interpret <em> text with a change in tone or stress, making it clearer to visually impaired users that the text is emphasized.
The <i> Element📝
- Purpose: The <i> tag is used to apply italic styling to text without implying any special meaning or emphasis. It’s more about visual appearance than semantic meaning.
- Semantic Meaning: <i> is a non-semantic element. It does not convey any additional meaning to the text it encloses, other than its visual styling.
- Default Styling: Text within an <i> tag is typically displayed in italics. It is used purely for stylistic purposes.
- Example:
<p>Hello This is <i> ToForZero </i>.</p>
- Here, "ToForZero" is displayed in italics, but there is no additional emphasis or meaning conveyed.
- Accessibility: Since <i> is non-semantic, screen readers do not provide special emphasis or additional information about the text styled with <i>.
HTML
September 06, 2024

Understanding HTML Form Attributes
HTML forms have several key attributes that control how form data is sent, processed, and displayed. These attributes allow developers to dictate where data goes, how it’s transmitted, and how the response is displayed. In this blog, we’ll explore the three most commonly used form attributes: action, method, and target.
1. action Attribute
What it does:
The action attribute specifies the URL where the form data will be sent once the form is submitted. This URL can point to a server-side script (like PHP) or an API endpoint that handles the data.
How to use it:
Set the action attribute to the URL where you want the form data to go.
<form action="https://toforzero.com/submit-form">
  <label for="username">Username:</label>
  <input type="text" id="username" name="username">
  <button type="submit">Submit</button>
</form>
When the user submits this form, the data will be sent to https://toforzero.com/submit-form.
Common Use Cases:
- Sending data to a specific page: Use the action attribute to point to a server-side script or page that processes the form data.
- Sending data to an API: In modern web apps, the action often points to an API endpoint.
2. method Attribute
What it does:
The method attribute defines how the form data is transmitted to the server. The two most common methods are GET and POST.
How to use it:
Set the method attribute to either get or post.
Example:
<form action="https://example.com/submit-form" method="post">
  <label for="email">Email:</label>
  <input type="email" id="email" name="email">
  <button type="submit">Submit</button>
</form>
This form uses the POST method to send data securely to the server.
GET vs POST:
- GET Method:
- Sends data as query parameters in the URL (e.g., https://toforzero.com/submit-form?email=user@toforzero.com).
- Less secure because data is visible in the URL, making it unsuitable for sensitive information (like passwords).
- Used for: Retrieving data, such as search queries.
- POST Method:
- Sends data in the body of the HTTP request, not in the URL.
- More secure since data isn't visible in the URL, making it ideal for sensitive data.
- Used for: Submitting forms that alter server data, such as user registrations or file uploads.
3. target Attribute
What it does:
The target attribute controls where the response to a submitted form is displayed. It determines whether the response opens in the same tab, a new tab, a frame, or a popup window.
How to use it:
Set the target attribute to one of the following values:
- _self: (Default) Opens the response in the same window or tab.
- _blank: Opens the response in a new tab or window.
- _parent: Opens the response in the parent frame (if using frames).
- _top: Breaks out of any frames and opens the response in the full window.
Example:
<form action="https://example.com/submit-form" method="post" target="_blank">
  <label for="name">Name:</label>
  <input type="text" id="name" name="name">
  <button type="submit">Submit</button>
</form>
When this form is submitted, the response will open in a new tab or window.
HTML
September 06, 2024
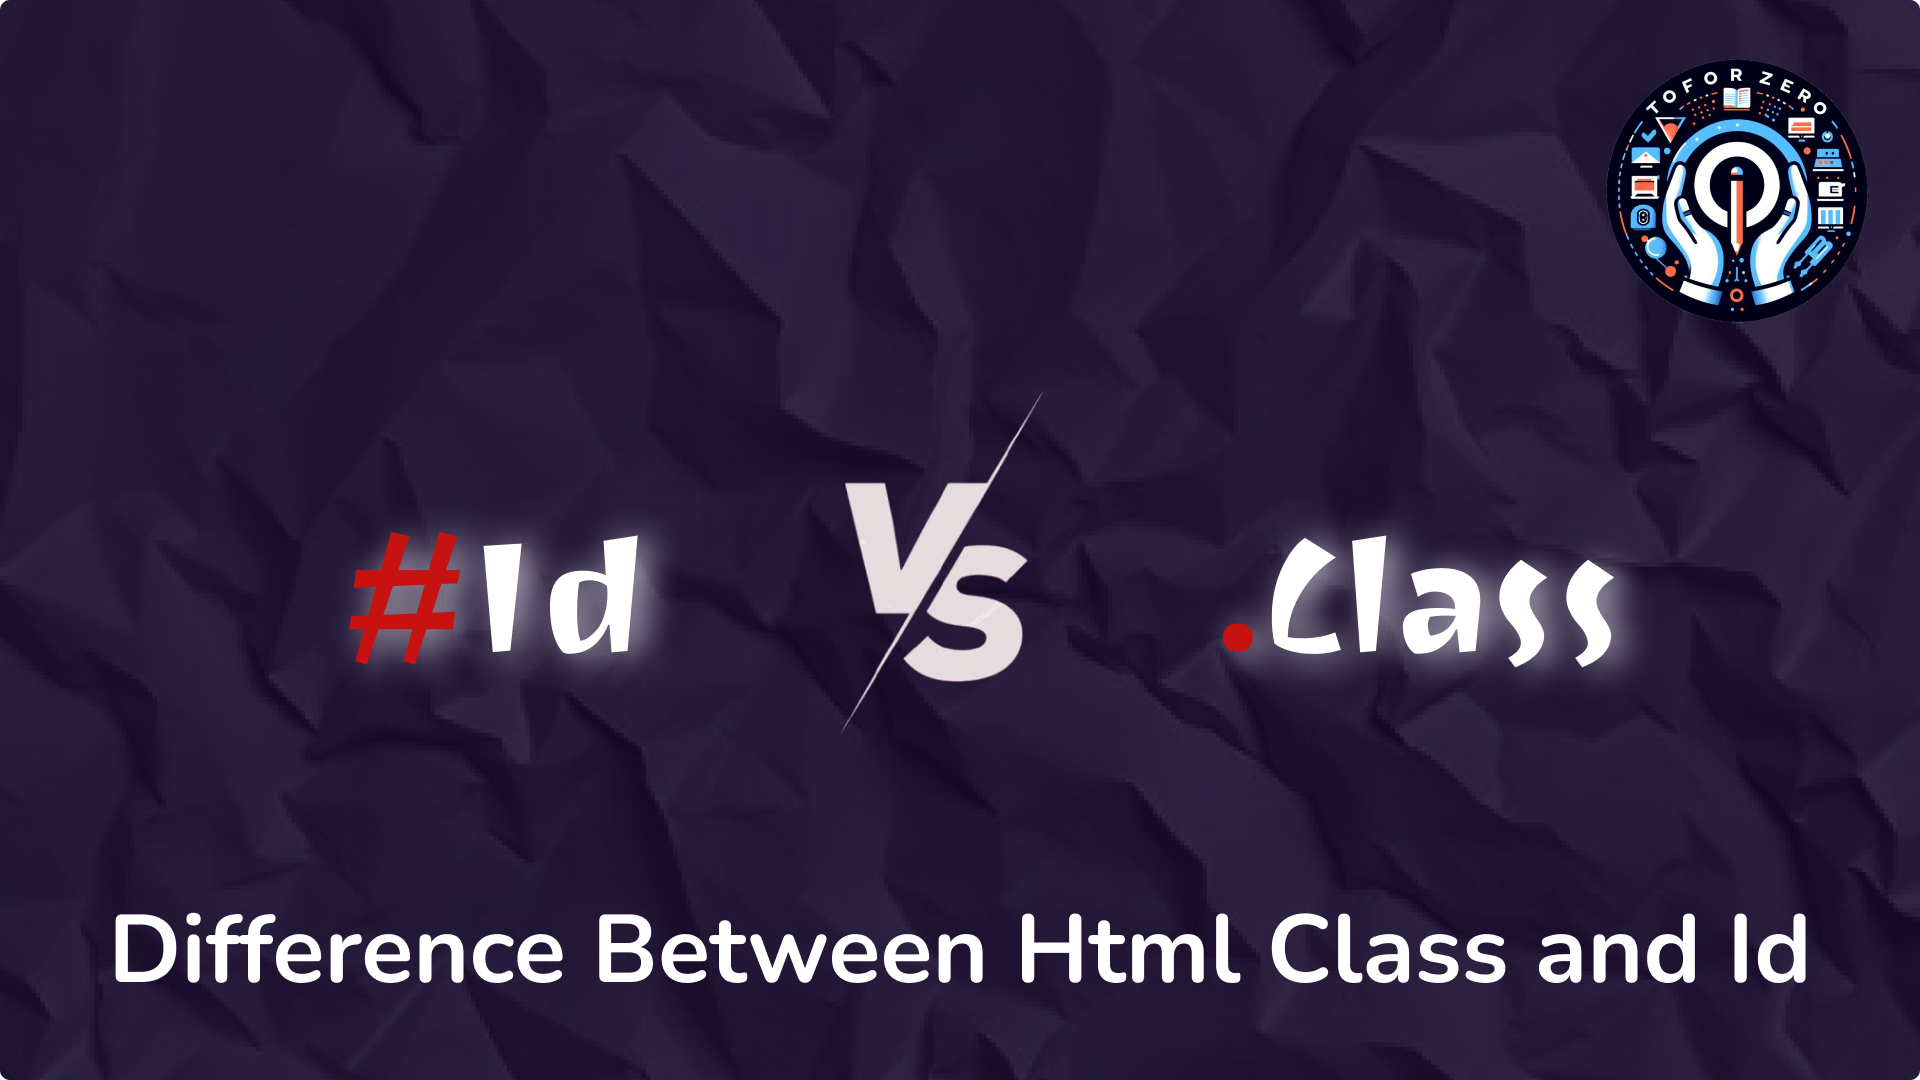
Understanding HTML class vs. id
When building web pages, knowing how to target elements for styling and scripting is essential. In HTML, both class and id attributes help assign values to elements, but they serve different purposes and have unique behaviors. Let’s dive into the key differences between them.
1. HTML id Attribute
An id is a unique identifier assigned to a single element on a webpage. Think of it as a special name tag that you use only once per page. Each id must be distinct within the HTML document, ensuring no two elements share the same id.
Key Characteristics:
- Uniqueness: An id must be assigned to only one element per document.
- Styling and Scripting: id is often used in CSS and JavaScript to apply specific styles or manipulate individual elements.
Example:
<div id="header"><h1>Welcome to My Website</h1>
</div>
In this example, the id="header" uniquely identifies the div element.
2. HTML class Attribute
A class is a label that can be assigned to multiple elements, allowing them to share the same styling or behavior. Think of a class as a group label that can be applied to several items to make them look or act the same.
Key Characteristics:
- Reusability: A class can be applied to as many elements as needed.
- Styling and Scripting: class is widely used in CSS to style groups of elements and in JavaScript to manipulate multiple elements with the same class name.
Example:
<div class="menu-item">Home</div>
<div class="menu-item">About</div>
<div class="menu-item">Contact</div>
Here, all three div elements share the class="menu-item", allowing them to be styled or manipulated together.
Key Differences:
Uniqueness:
- id must be unique within the document (one element per id).
- class can be shared by multiple elements.
Targeting:
- In CSS, an id is selected with #idName.
- In CSS, a class is selected with .className.
Use Cases:
- Use id for unique elements that need specific styling or behavior (like headers or footers).
- Use class for groups of elements that require the same styling or behavior (like buttons or list items).
HTML
September 06, 2024

Introduction to CSS
- CSS (Cascading Style Sheets) is a language used to describe the presentation of web pages, including colors, layout, and fonts. It allows developers to separate content (HTML) from design, enabling more control over the appearance of a website. CSS has evolved significantly since its inception, with each version bringing new features and capabilities.
The Origins of CSS
The Need for CSS
- Before CSS, styling was directly embedded in HTML using attributes like <font>, <b>, and <i>. This made the HTML code messy and hard to maintain. The concept of separating content from presentation led to the development of CSS.🧩
- Example:
<p style="font-family: Arial; color: blue">
  This is an example of inline styling.
</p>
- Explanation: Inline styling, as shown in the example, was cumbersome and difficult to manage for larger projects.
The Birth of CSS
- Year: CSS was first proposed by Håkon Wium Lie in 1994 while working with Tim Berners-Lee at CERN.📅
- Purpose: To enable the separation of document structure from document presentation.
- First CSS Specification: CSS1 was officially released by the W3C (World Wide Web Consortium) in December 1996.🎉
CSS1: The First Version
Overview
Release Date: December 1996
Key Features:
- Basic styling for text (fonts, colors, spacing).
- Control over margins, borders, padding.
- Limited control over layout using properties like float and clear.🌟
- Example:
p {
  font-family: Arial, sans-serif;
  color: blue;
  margin: 10px;
}
- Explanation: This CSS rule applies a font family, color, and margin to all paragraphs.
CSS2: The Evolution
Overview
Release Date: May 1998
Key Enhancements:
- Added support for media types (e.g., screen, print).
- Introduced the z-index property for controlling the stacking order of elements.
- Improved control over positioning with absolute, relative, and fixed positioning.
- Enhanced table layout capabilities.📈
- Example:
div {
  position: absolute;
  top: 50px;
  left: 100px;
}
- Explanation: This CSS rule positions a div element 50 pixels from the top and 100 pixels from the left of its containing block
Challenges
- Browser compatibility issues.
- Limited support for custom fonts and complex layouts. ⚠️
CSS2.1: The Stabilized Version
Overview
- Release Date: June 2011
- Purpose: CSS2.1 was a revision of CSS2 to fix errors and inconsistencies.
Key Updates:
- Removed some features from CSS2 that were not widely supported.
- Enhanced browser compatibility.
- Introduced the min-width and max-width properties for better control over responsive design.📏
- Example:
img {
  max-width: 100%;
  height: auto;
}
- Explanation: This rule ensures that images do not exceed the width of their container, maintaining aspect ratio.
Impact
- CSS2.1 became the foundation for many websites, offering stable and reliable styling options. 🌐
CSS3: The Modern Standard
Overview
Release Date: CSS3 was introduced in 1999, but it is modular, with different features being released at different times.
Key Features:
- Modules: CSS3 is divided into modules like Selectors, Box Model, Backgrounds and Borders, Animations, and more.📚
- New Selectors: Introduced advanced selectors like nth-child, nth-of-type, attribute selectors.
- Responsive Design: Media queries allow for responsive design, adapting layouts to different screen sizes.
- Flexbox and Grid: New layout models for complex and flexible designs.
- Animations and Transitions: Added capabilities for animating elements with CSS.
- Custom Fonts: Support for web fonts using @font-face.🆕
- Examples:
- Media Queries:
@media screen and (max-width: 600px) {
  body {
    background-color: lightblue;
  }
}
- Flexbox:
.container {
  display: flex;
  justify-content: space-between;
}
- Animations:
@keyframes example {
  from {
    background-color: red;
  }
  to {
    background-color: yellow;
  }
}
div {
  animation-name: example;
  animation-duration: 4s;
}
- Explanation: CSS3 brought a wealth of new features, enabling designers to create more sophisticated and interactive websites. The modular approach allows for continuous updates and improvements.🚀
CSS
September 07, 2024
Introduction
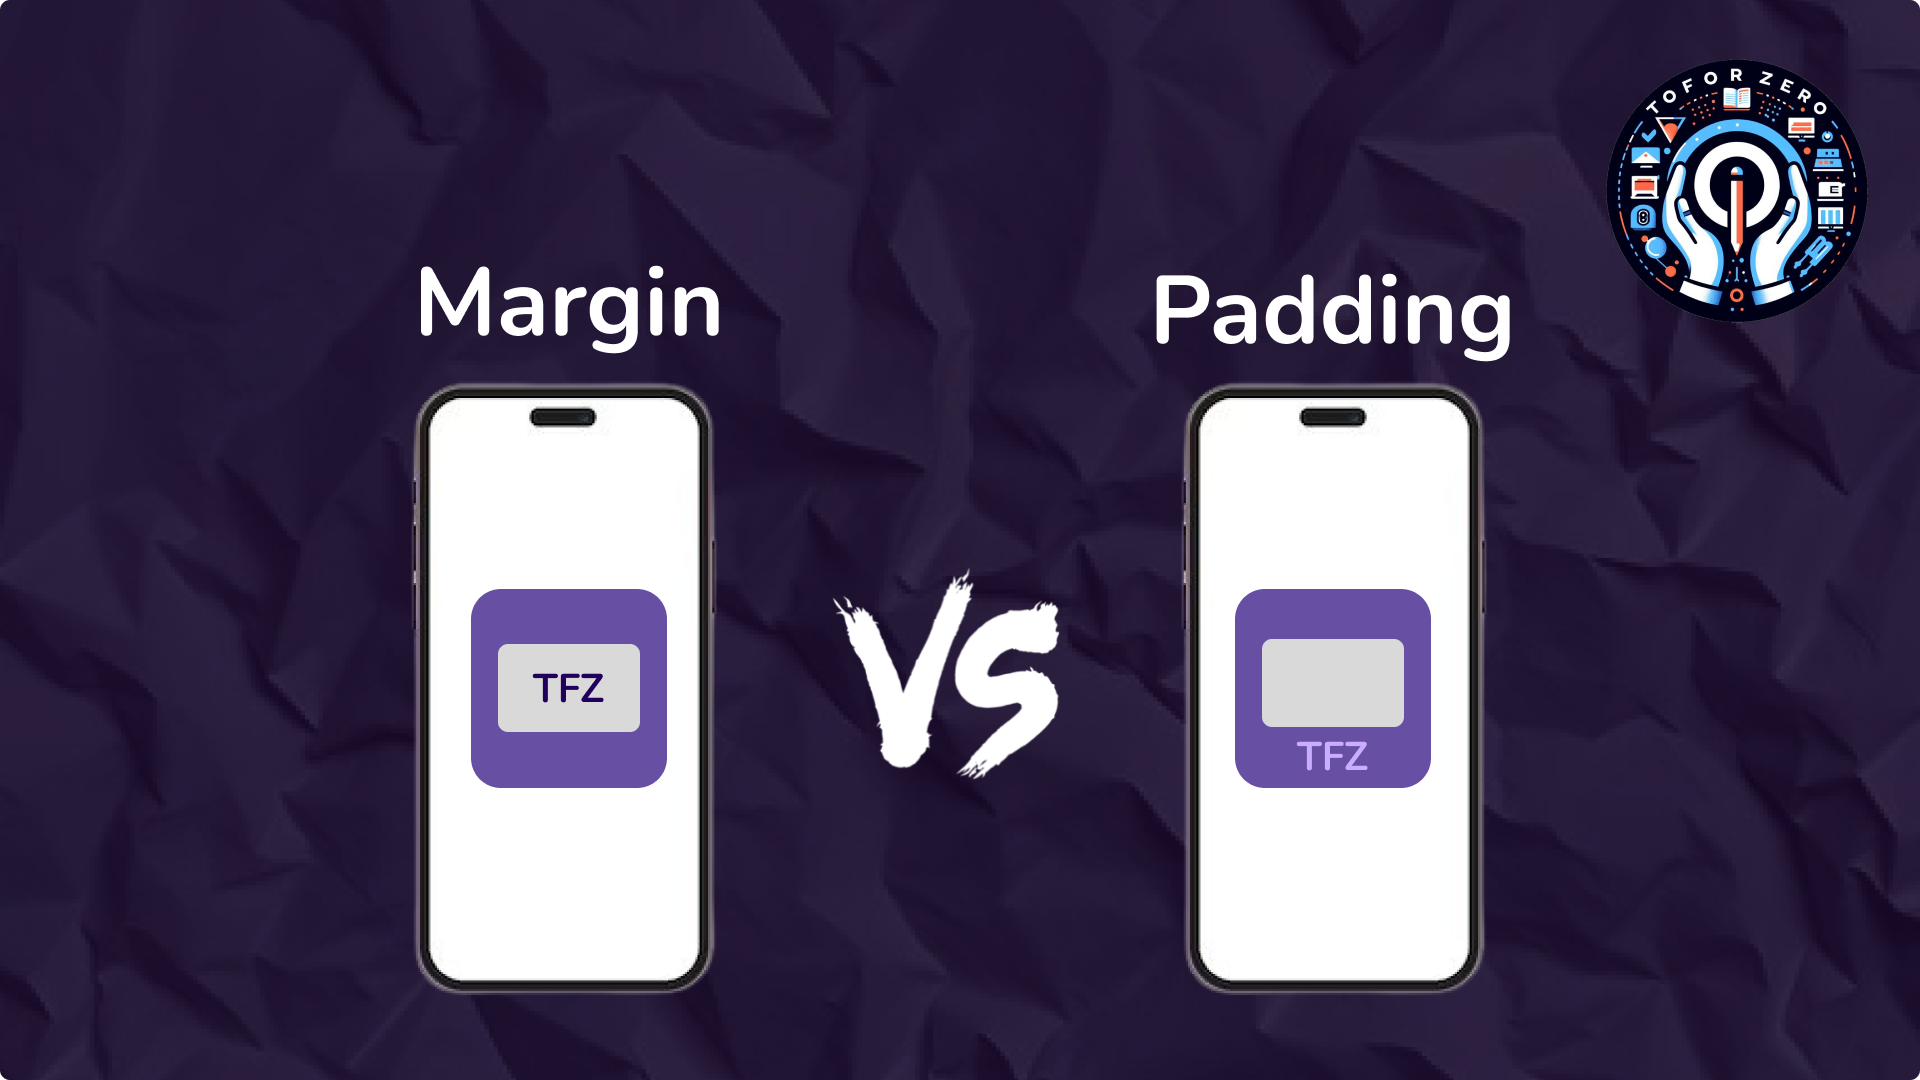
- In CSS, margin and padding are two key properties that control the spacing around elements on a webpage. Though they may seem similar, they serve different purposes and are used in different ways. Understanding the difference between margin and padding is essential for creating well-structured and visually appealing layouts.
What is Padding?🛠️
- Definition:
- Padding is the space between the content of an element and its border. It creates an "inner space" around the content within the element.
How Padding Works:
- When you add padding to an element, it increases the space between the content and the element's border, but it does not affect the space outside the element.
- Syntax:
element {
  padding: value; /* Example: padding: 10px; */
}
- Example:
<div style="border: 2px solid black; padding: 20px">
  This div has padding of 20px.
</div>
- Explanation: In this example, the content inside the div is pushed 20px away from the border on all sides, creating space within the element.
- Use Case:
- Padding is useful when you want to create space inside an element, such as when you want text to be spaced away from the edges of a box or a button.
What is Margin?🧭
- Definition:
- Margin is the space outside an element's border. It creates "outer space" between the element and its surrounding elements.
How Margin Works:
- When you add margin to an element, it increases the space around the element but does not affect the space inside the element.
- Syntax:
element {
  margin: value; /* Example: margin: 10px; */
}
- Example:
<div style="border: 2px solid black; margin: 20px">
  This div has a margin of 20px.
</div>
- Explanation: In this example, the div is placed 20px away from surrounding elements on all sides, creating space around the element.
- Use Case:
- Margin is useful when you want to create space between elements, such as separating a group of boxes, paragraphs, or images on a page.
Key Differences Between Padding and Margin🔍
- Purpose:
- Padding: Creates space inside an element, between the content and the border.
- Margin: Creates space outside an element, between the element and surrounding elements.
Impact on Element Size:
- Padding: Increases the size of the element, as the padding is added to the inside of the element.
- Margin: Does not increase the size of the element; it simply creates space around the element.
Visual Representation:
- Padding:
- If you add padding to a div, the content inside the div will move inward, creating more space within the div.
- Margin:
- If you add margin to a div, the entire div will move away from other elements, creating more space around it.
CSS Box Model:
- Padding: Part of the element's box model, included inside the border.
- Margin: Outside the element's box model, creating space beyond the border.
CSS
September 07, 2024
Introduction
- In CSS, both border and outline are used to draw lines around elements, but they serve different purposes and behave differently. This tutorial will guide you through the differences between border and outline, how to use them, and when to choose one over the other.
What is a Border? 🖼️
- Definition:
- A border in CSS is a line that surrounds the content and padding of an element. It is part of the element's box model and affects the layout.
How Borders Work:
- Borders are applied directly to the edges of an element's box. They are included in the element's dimensions and can be styled with different widths, colors, and styles.
- Syntax:
border: width style color;
- Example:
border: 2px solid black;
- Example in Action:
<style>

  .box {
    width: 200px;
    height: 100px;
    border: 3px dashed blue;
  }

</style>

<div class="box">This box has a border.</div>
What is an Outline?✨
- Definition:
- An outline in CSS is a line drawn around the outside of an element. Unlike borders, outlines do not take up space and do not affect the element's size or position in the layout.
How Outlines Work:
- Outlines are drawn outside the element's border and do not interfere with the box model. They are often used for accessibility purposes, such as highlighting focused elements.
- Syntax:
outline: width style color;
- Example:
outline: 2px solid red;
- Example in Action:
<style>

  .box {
    width: 200px;
    height: 100px;
    outline: 3px dotted green;
  }

</style>

<div class="box">This box has an outline.</div>
Key Differences Between Border and Outline🧐
Placement:
- Border: Sits inside the element's box and is part of the element's dimensions.
- Outline: Sits outside the element's box and does not affect the element's dimensions.
Space Consumption:
- Border: Adds to the size of the element, potentially affecting the layout.
- Outline: Does not add to the size of the element and does not affect the layout.
Customizability:
- Border: Can be styled individually for each side (top, right, bottom, left) using properties like border-top, border-right, etc.
- Outline: Is a single line that cannot be customized for each side individually.
Impact on Layout:
- Border: Since it is part of the box model, it can shift the position of surrounding elements.
- Outline: Being outside the box model, it does not shift the position of surrounding elements.
CSS
September 07, 2024

Meta Tags and Their Importance in SEO
The <meta> tag defines metadata about an HTML document. Metadata is information about the data on a webpage and plays a crucial role in SEO (Search Engine Optimization). Meta tags are placed within the <head> section of an HTML document and are not visible on the page but help search engines and browsers understand your content.
Common Meta Tag Attributes:
- name: Specifies the type of metadata. Common values include description, keywords, author, and viewport.
<meta name="description" content="A brief description of the page.">
- content: Provides the value for the name or http-equiv attribute.
<meta name="keywords" content="HTML, CSS, JavaScript">
- http-equiv: Acts as an HTTP header for the page. Common values include content-type, refresh, and X-UA-Compatible.
<meta http-equiv="refresh" content="30">
- charset: Specifies the character encoding for the HTML document, essential for displaying special characters correctly.
<meta charset="UTF-8">
- viewport: Controls the size and scaling of the viewport, important for responsive design.
<meta name="viewport" content="width=device-width, initial-scale=1.0">
- property: Used by Open Graph meta tags to define metadata for social media sharing, like the title or description of shared content.
<meta property="og:title" content="Title of the page">
- scheme: Defines the scheme used for the content (less commonly used).
<meta name="identifier" content="1234" scheme="ISBN">
Meta Tag Examples
1. Basic Metadata Example
- The following example shows a set of basic meta tags used for SEO:
<!DOCTYPE html>
<html lang="en">
<head><meta charset="UTF-8"><meta name="description" content="A brief description of the page for search engines."><meta name="keywords" content="HTML, CSS, JavaScript, Web Development"><meta name="author" content="John Doe"><meta name="viewport" content="width=device-width, initial-scale=1.0"><title>Example Meta Tags</title>
</head>
<body><h1>Welcome to My Website</h1>
</body>
</html>
2. Open Graph Tags (for Social Media)
- Open Graph meta tags help optimize how content appears when shared on social media platforms.
<!DOCTYPE html>
<html lang="en">
<head><meta charset="UTF-8"><meta property="og:title" content="Example Open Graph Title"><meta property="og:description" content="A description that will appear when this page is shared on social media."><meta property="og:image" content="https://example.com/image.jpg"><meta property="og:url" content="https://example.com"><title>Open Graph Meta Tags</title>
</head>
<body><h1>Open Graph Example</h1>
</body>
</html>
3. HTTP-Equiv Meta Tags (e.g., Auto-Refresh)
- You can use the http-equiv attribute to refresh the page at set intervals or to specify browser compatibility.
<!DOCTYPE html>
<html lang="en">
<head><meta charset="UTF-8"><meta http-equiv="refresh" content="30"><meta http-equiv="X-UA-Compatible" content="IE=edge"><title>HTTP-Equiv Meta Tags</title>
</head>
<body><h1>Auto-refresh Page Every 30 Seconds</h1>
</body>
</html>
4. Viewport Meta Tag (Responsive Design)
- The viewport meta tag is essential for making your webpage responsive and adjusting the layout based on the user's device.
<!DOCTYPE html>
<html lang="en">
<head><meta charset="UTF-8"><meta name="viewport" content="width=device-width, initial-scale=1.0"><title>Responsive Design Meta Tags</title>
</head>
<body><h1>Responsive Design with Viewport Meta Tag</h1>
</body>
</html>
HTML, CSS, Web
September 07, 2024
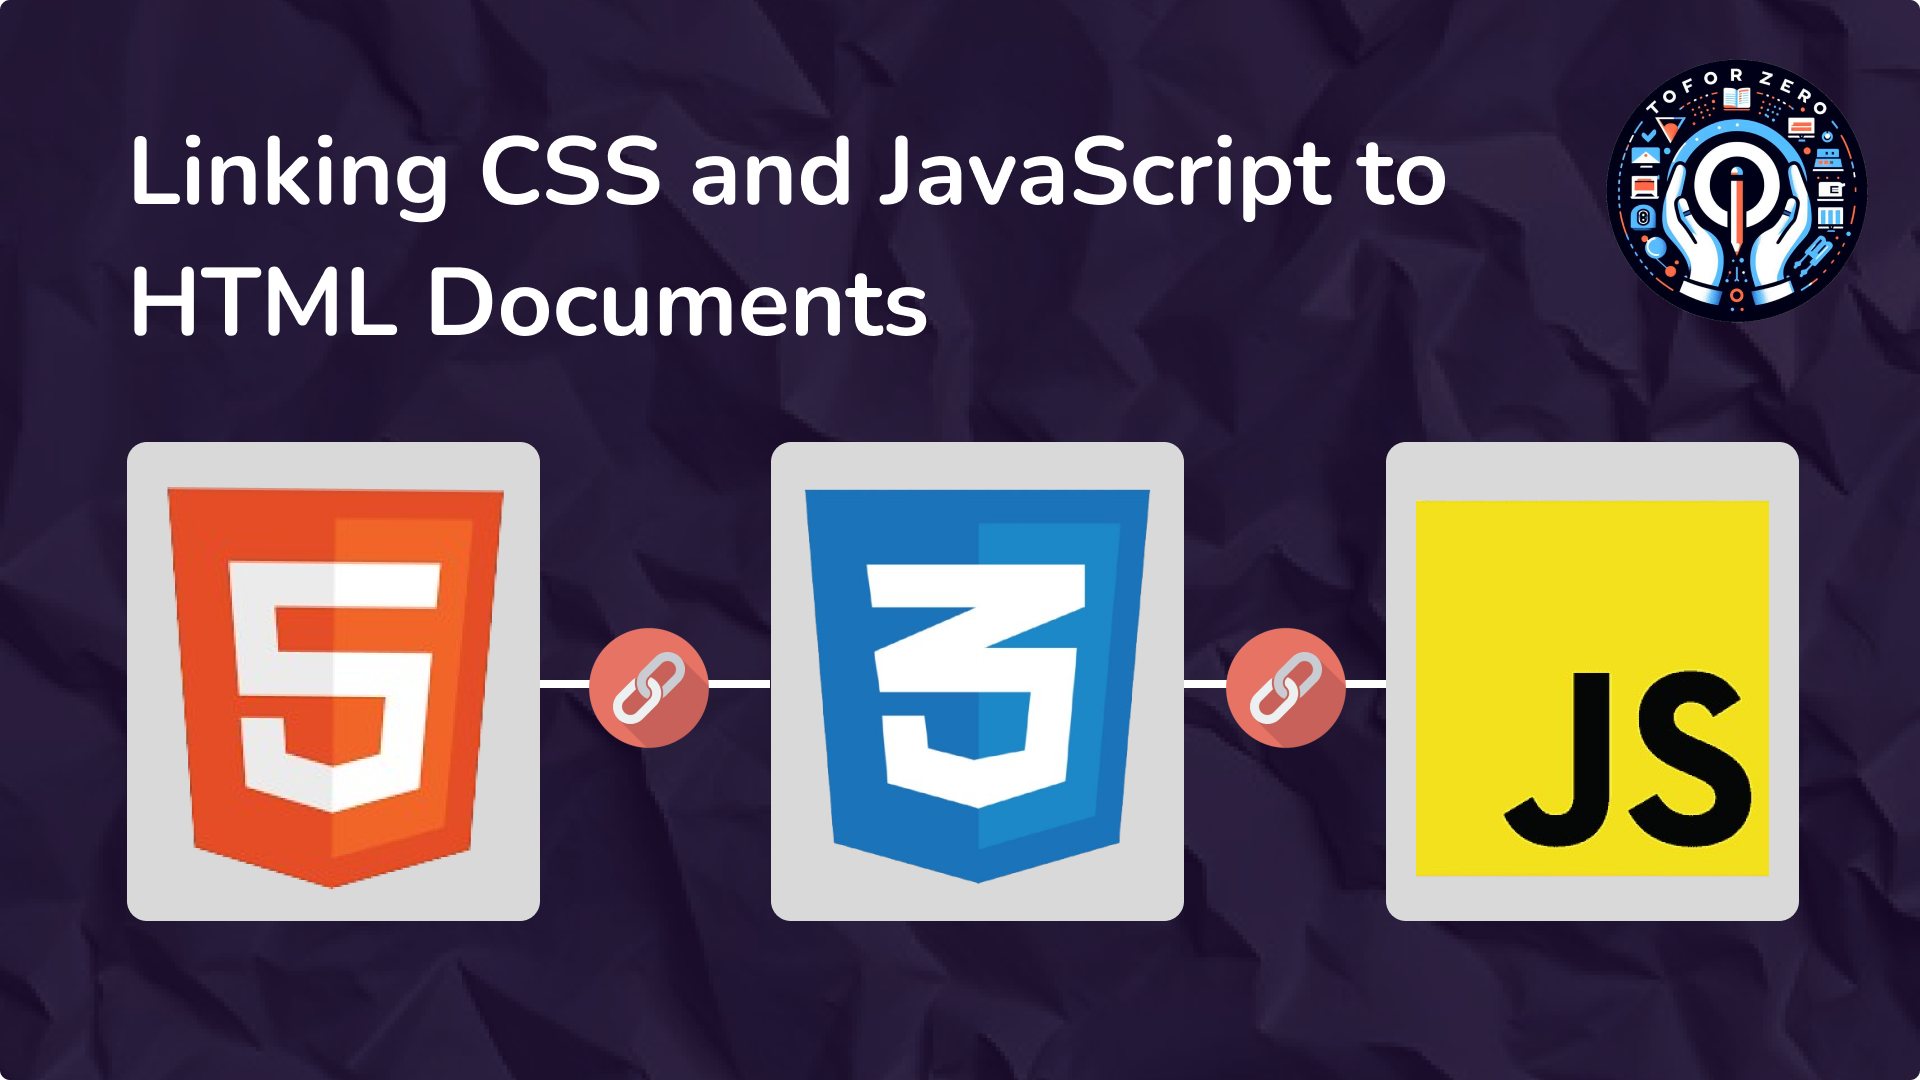
- Linking CSS and JavaScript files to an HTML document is essential for adding styling and interactivity to a webpage.
[A]. Linking CSS
- You can link an external CSS file to an HTML document using the <link> element. The <link> element is placed inside the <head> section of the HTML document.
- Example:
<!DOCTYPE html>
<html lang="en">
<head>
<meta charset="UTF-8">
<meta name="viewport" content="width=device-width, initial-scale=1.0">
<title>Linking CSS Example</title>
<link rel="stylesheet" href="styles.css">
</head>
<body>
<h1>Welcome to My Website</h1>
<p>This is a paragraph styled with external CSS.</p>
</body>
</html>
In this example:
- The <link> element has an href attribute that points to the styles.css file.
- The rel="stylesheet" attribute specifies that the linked file is a stylesheet.
- The CSS file (styles.css) contains the styles that will be applied to the HTML elements.
- Example
- styles.css:
body {
    font-family: Arial, sans-serif;
    background-color: #f4f4f4;
}

h1 {
    color: #333;
}

p {
    color: #666;
}
[B]. Linking JavaScript
- You can link an external JavaScript file to an HTML document using the <script> element. The <script> element can be placed either in the <head> section or just before the closing </body> tag.
- Example:
<!DOCTYPE html>
<html lang="en">
<head>
<meta charset="UTF-8"><meta name="viewport" content="width=device-width, initial-scale=1.0">
<title>Linking JavaScript Example</title><link rel="stylesheet" href="styles.css">
</head>
<body>
<h1>Welcome to My Website</h1>
<button id="myButton">Click Me</button>

<script src="script.js"></script>
</body>
</html>
In this example:
- The <script> element has a src attribute that points to the script.js file.
- The script.js file contains JavaScript code that will be executed when the webpage loads.
- The <script> tag is placed just before the closing </body> tag to ensure that the HTML content loads before the JavaScript is executed.
- Example
- script.js:
document.getElementById("myButton").addEventListener("click", function() {
    alert("Button clicked!");
});
HTML, CSS, JavaScript
September 07, 2024
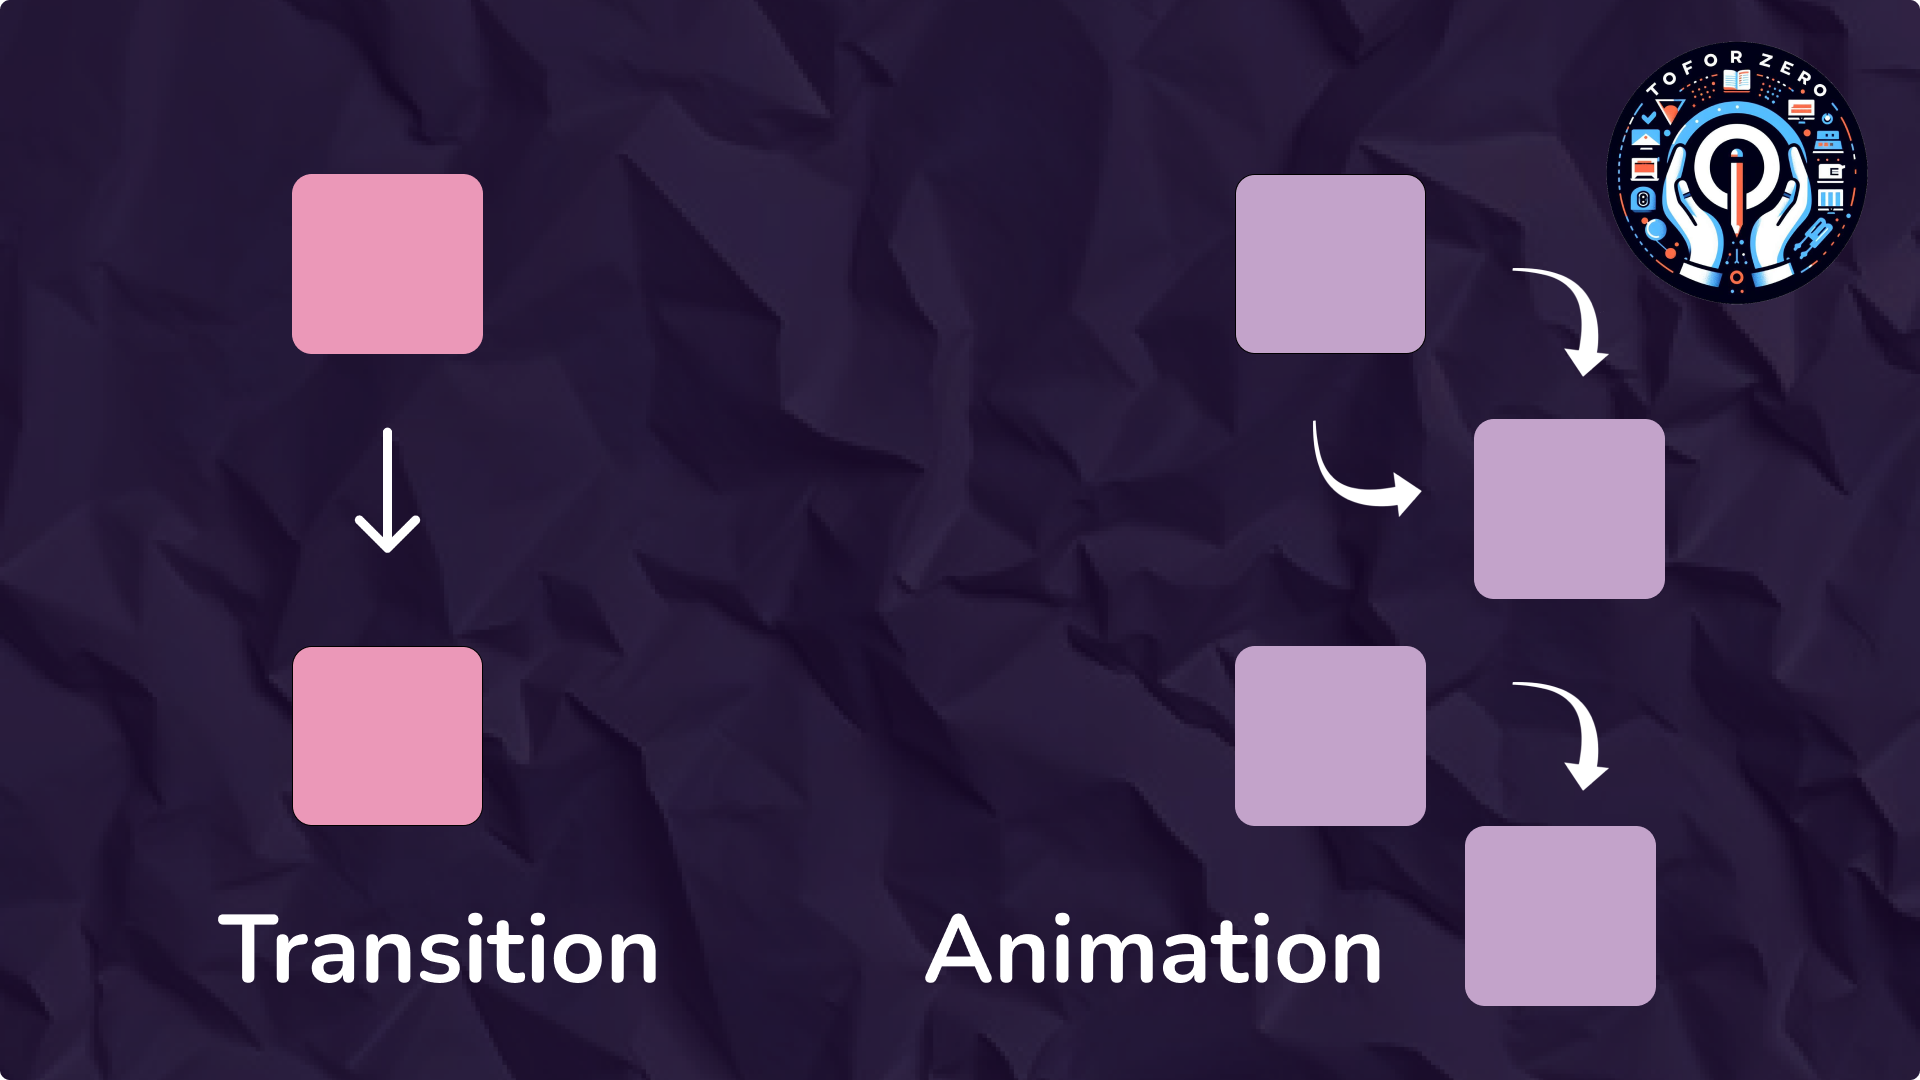
CSS Animation and Transition are powerful tools used to create smooth visual effects on web pages, enhancing the user experience. Here's an overview of each:
When to Use Transitions vs. Animations:
- Transitions are ideal for simple state changes, such as hover effects or toggling visibility. They are easy to implement and work well for straightforward interactions.
- Animations are more powerful and flexible, allowing for complex sequences of changes. They are useful for more elaborate effects, such as loading spinners, keyframe-based animations, or continuously repeating effects.
[A]. CSS Transition
- Purpose: CSS transitions allow you to change property values smoothly (over a given duration), rather than having them change instantly. They are great for simple hover effects, button interactions, or toggling visibility.
Key Properties:
- transition-property: Specify the CSS property you want to add the transition effect to (e.g., width, color, background-color, etc.).
- transition-duration: Defines how long the transition should take (e.g., 0.5s).
- transition-timing-function: Controls the speed curve of the transition (e.g., ease, linear, ease-in, ease-out, etc.).
- transition-delay: Sets a delay before the transition starts.
- Example:
<html>
<head>
<style>
.button {
  background-color: blue;
  transition: background-color 0.3s ease;
}

.button:hover {
  background-color: green;
}
</style>
</head>
<body>

<h1>CSS Animation</h1>

<div class="button">Click Me</div>

</body>
</html>
- In this example, when the user hovers over the .button, the background color changes from blue to green over 0.3 seconds.
[B]. CSS Animation
- Purpose: CSS animations allow you to animate transitions between multiple states. Unlike transitions, which require a trigger like hover, animations can start automatically and loop continuously if desired.
Key Properties:
- @keyframes: Defines the sequence of styles for the animation. You can specify different styles at different points (percentages) in the animation.
- animation-name: The name of the @keyframes animation you want to apply.
- animation-duration: Specifies how long the animation takes to complete one cycle.
- animation-timing-function: Defines the speed curve of the animation.
- animation-delay: Sets a delay before the animation starts.
- animation-iteration-count: Specifies how many times the animation should repeat (e.g., infinite, 1, 3, etc.).
- animation-direction: Defines whether the animation should play in reverse on alternate cycles (e.g., normal, reverse, alternate, etc.).
- Example:
<html>
<head>
<style>
@keyframes move {
  0% { transform: translateX(0); }
  50% { transform: translateX(100px); }
  100% { transform: translateX(0); }
}

.box {
  width: 50px;
  height: 50px;
  background-color: red;
  animation: move 2s ease-in-out infinite;
}
</style>
</head>
<body>

<h1>CSS Animation</h1>

<div class="box"></div>

</body>
</html>
HTML, CSS
September 07, 2024

CSS frameworks are tools that provide pre-written CSS code to help developers quickly and efficiently create responsive and consistent web designs. They typically include a grid system, predefined styles for common UI elements, and sometimes JavaScript components for interactive features.
Popular CSS Frameworks
1. Bootstrap
- Description: One of the most widely used CSS frameworks, Bootstrap provides a comprehensive set of CSS, JavaScript, and HTML components for creating responsive, mobile-first websites. It includes a grid system, buttons, forms, modals, and more.
- Website: getbootstrap.com
2. Tailwind CSS
- Description: Tailwind CSS is a utility-first framework that allows developers to build custom designs without having to write custom CSS. It provides low-level utility classes that can be composed to create complex designs.
- Website: tailwindcss.com
3. Foundation
- Description: Foundation by Zurb is a responsive front-end framework that offers a flexible grid system and many UI components. It's known for its modularity and flexibility, allowing developers to customize it to their needs.
- Website: foundation.zurb.com
4. Bulma
- Description: Bulma is a modern CSS framework based on Flexbox. It's fully responsive and provides a clean, minimalist design. Bulma is known for being lightweight and easy to use.
- Website: bulma.io
5. Materialize
- Description: Materialize is a CSS framework based on Google’s Material Design principles. It provides a range of UI components like buttons, cards, and forms that adhere to Material Design guidelines.
- Website: materializecss.com
6. Semantic UI
- Description: Semantic UI is a framework that uses human-friendly HTML to create responsive, beautiful layouts. It includes a wide variety of UI components and a comprehensive theming system.
- Website: semantic-ui.com
7. Pure.css
- Description: Pure.css is a minimal CSS framework created by Yahoo. It’s designed to be tiny (only 3.8 KB compressed) and includes only the essentials for building responsive web layouts.
- Website: purecss.io
8. UIkit
- Description: UIkit is a lightweight and modular front-end framework for developing fast and powerful web interfaces. It comes with a range of components and a flexible theming system.
- Website: getuikit.com
CSS, HTML, Web
September 07, 2024
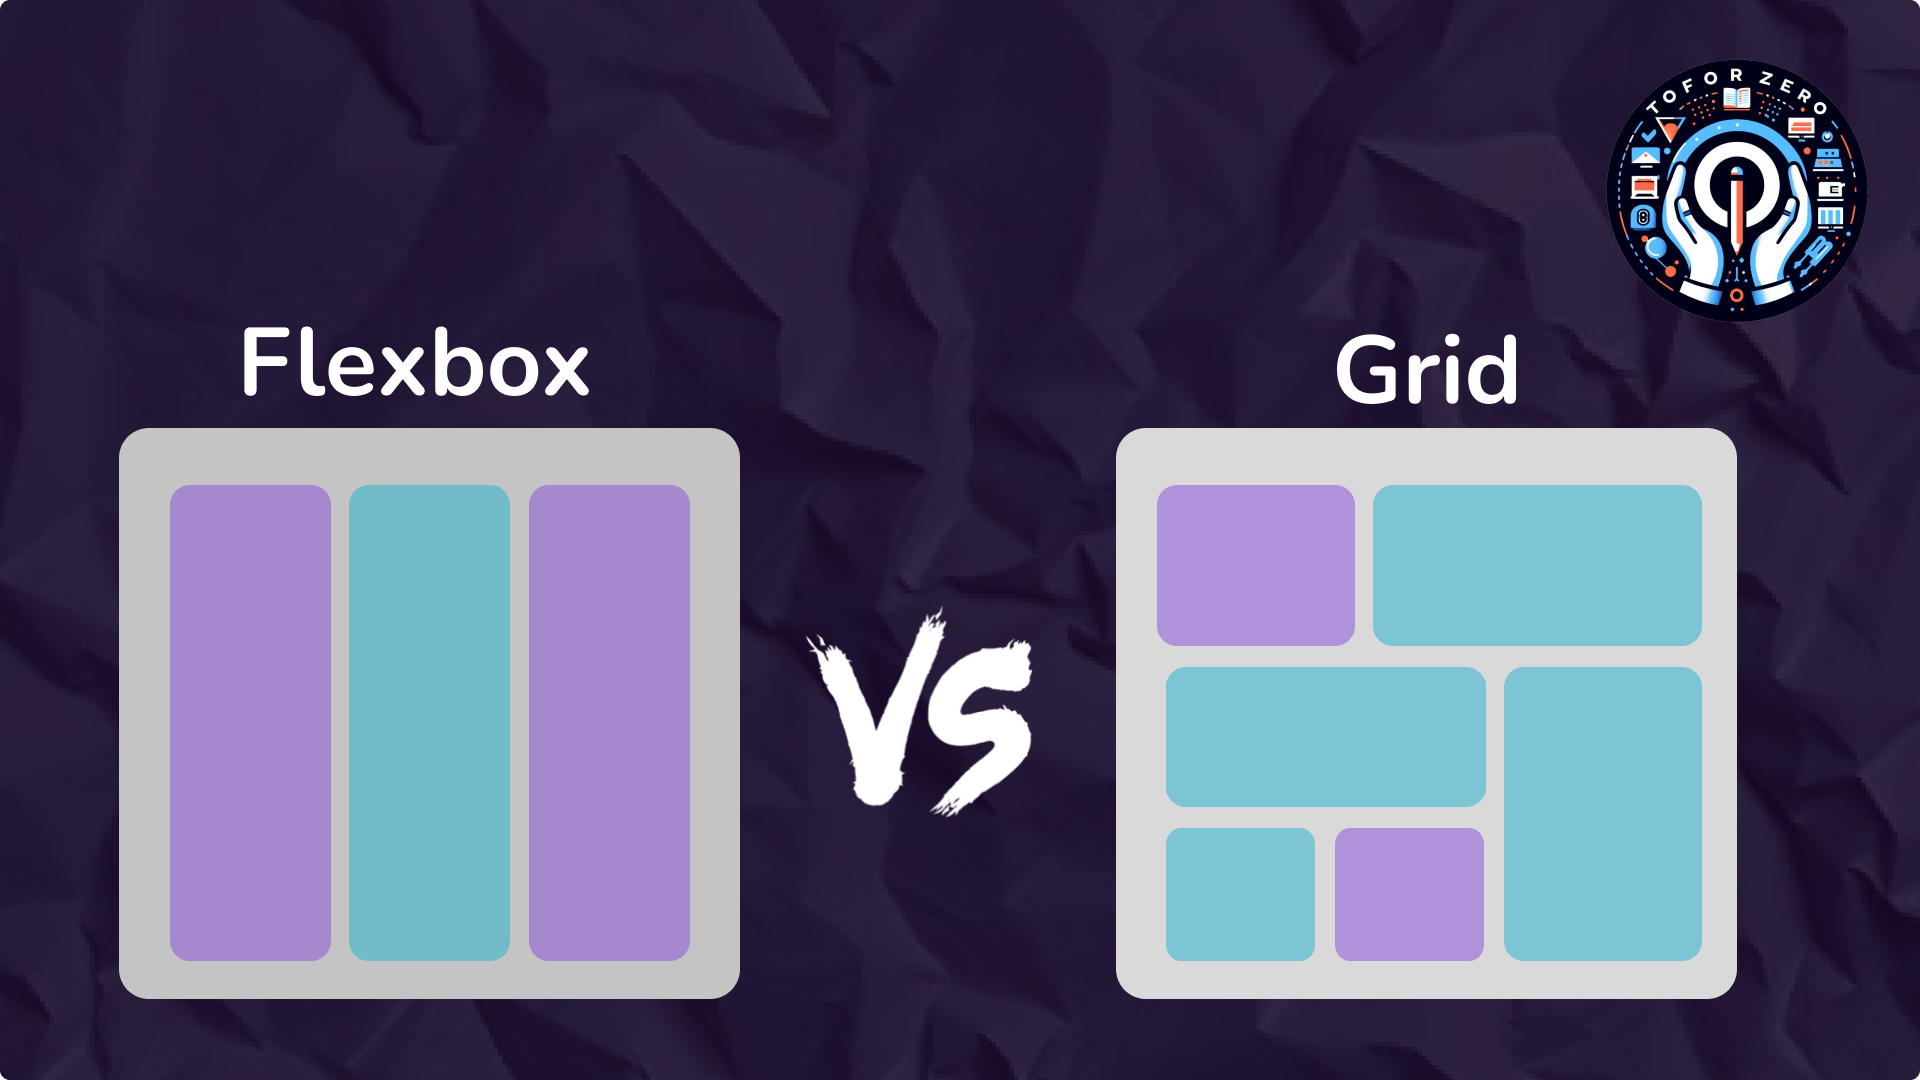
CSS Grid vs. CSS Flexbox: Comprehensive Comparison
CSS Grid and CSS Flexbox are two CSS layout systems designed to address different layout challenges. This guide will help you understand their unique features and use cases.
1. Layout Dimensions
CSS Grid:
- Two-Dimensional Layout: Handles both rows and columns simultaneously. Ideal for complex layouts requiring control over both axes.
Example:
.grid-container {
    display: grid;
    grid-template-columns: 1fr 2fr;
    grid-template-rows: 100px auto;
}

<div class="grid-container"><div>Header</div><div>Main Content</div><div>Sidebar</div>
</div>
CSS Flexbox:
- One-Dimensional Layout: Manages layout in a single direction (row or column). Best for simpler, linear layouts.
Example:
.flex-container {
    display: flex;
    flex-direction: row; /* Horizontal layout */
}

<div class="flex-container">
    <div>Item 1</div><div>Item 2</div>
</div>
2. Use Cases
CSS Grid:
- Best For: Complex layouts such as web pages, dashboards, and grid-based designs.
Example:
.grid-container {
    display: grid;
    grid-template-columns: repeat(3, 1fr);
    gap: 10px;
}

<div class="grid-container"><div>Item 1</div><div>Item 2</div><div>Item 3</div>
</div>
CSS Flexbox:
- Best For: Simple, linear layouts like navigation bars, toolbars, or aligning items within a container.
Example:
.flex-navbar {
    display: flex;
    justify-content: space-between;
}

<div class="flex-navbar"><a href="#">Home</a><a href="#">About</a><a href="#">Contact</a>
</div>
3. Layout Control
CSS Grid:
- Defines Rows and Columns: Allows explicit sizing of rows and columns. Items can span multiple rows or columns.
Example:
.grid-container {
    display: grid;
    grid-template-columns: 1fr 2fr;
    grid-template-rows: auto;
}
.item1 {
    grid-column: 1 / 3; /* Span across 2 columns */
}

<div class="grid-container">
    <div class="item1">Item 1</div><div>Item 2</div>
</div>
CSS Flexbox:
- Defines Flexibility: Manages item growth, shrinkage, and alignment within a single axis. Items can wrap if there’s not enough space.
Example:
.flex-container {
    display: flex;
    flex-wrap: wrap; /* Wrap items to next line */
}

<div class="flex-container">
    <div>Item 1</div><div>Item 2</div><div>Item 3</div>
</div>
4. Alignment and Justification
CSS Grid:
- Alignment: Can be applied both horizontally and vertically across grid areas.
Example:
.grid-container {
    display: grid;
    align-items: center; /* Vertical alignment */
    justify-items: center; /* Horizontal alignment */
}
CSS Flexbox:
- Alignment: Applied along the main axis (horizontal) and the cross axis (vertical).
Example:
.flex-container {
    display: flex;
    justify-content: center; /* Horizontal alignment */align-items: center;     /* Vertical alignment */
}
5. Features
CSS Grid:
- Grid Tracks: Defines explicit rows and columns with specific sizes and gaps.
- Grid Areas: Allows positioning items in defined grid areas.
- Template Areas: Creates layout templates with named areas.
Example:
.grid-container {
    display: grid;
    grid-template-areas:
        "header header""sidebar content""footer footer";
}
.header { grid-area: header; }
.sidebar { grid-area: sidebar; }
.content { grid-area: content; }
.footer { grid-area: footer; }
CSS Flexbox:
- Flex Containers and Items: Defines how items flex (grow or shrink) and align within a container.
- Direction and Wrapping: Controls item direction (row/column) and wrapping behavior.
Example:
.flex-container {
    display: flex;
    flex-direction: column; /* Vertical layout */
}
6. Browser Support
CSS Grid:
- Supported by: All modern browsers; older versions might need prefixes or polyfills.
- Example: Modern browsers like Chrome, Firefox, and Edge fully support CSS Grid.
CSS Flexbox:
- Supported by: All modern browsers and is generally well-supported in older versions.
- Example: Flexbox works well even in older browsers like IE11 with some prefixing.
7. Complexity
CSS Grid:
- Complexity: More complex, offering greater control for intricate layouts.
Example:
.grid-container {
    display: grid;
    grid-template-columns: repeat(3, 1fr);
    gap: 10px;
}
CSS Flexbox:
- Complexity: Simpler, focusing on one-dimensional layouts and alignment.
Example:
.flex-container {
    display: flex;
    justify-content: space-around; /* Space around items */
}
8. Responsive Design
CSS Grid:
- Responsive Design: Allows for complex responsive designs with media queries to rearrange grid items and areas.
Example:
.grid-container {
    display: grid;
    grid-template-columns: 1fr;
}
@media (min-width: 600px) {
    .grid-container {
        grid-template-columns: 1fr 1fr;
    }
}
CSS Flexbox:
- Responsive Design: Handles responsive design by adjusting item sizes and alignment based on available space.
Example:
.flex-container {
    display: flex;
    flex-direction: column;
}
@media (min-width: 600px) {
    .flex-container {
        flex-direction: row;
    }
}
CSS Grid and CSS Flexbox are both essential layout tools in modern web design. CSS Grid is ideal for complex, two-dimensional layouts, offering precise control over both rows and columns. CSS Flexbox is better suited for simpler, one-dimensional layouts where alignment and distribution within a single axis are key. Understanding the strengths of each will help you create responsive and well-structured designs effectively.
CSS
September 07, 2024

What is React?
React is a widely used JavaScript library for building dynamic user interfaces (UIs). It was developed by Facebook and has become a popular tool for front-end development. Unlike a full-fledged framework, React focuses solely on the view layer (the part of the application users interact with), making it a flexible choice for various projects.
Why Use React?
- Component-Based: React allows developers to create reusable, self-contained components that manage their own state. These components can be combined to build complex UIs.
- Declarative: React simplifies UI development by letting developers describe how the UI should look for each state of the application.
- Reusable: Once you create a React component, it can be reused throughout your app, which increases efficiency and maintainability.
Who Uses React?
React is trusted by tech giants like Facebook, Instagram, Netflix, and Airbnb. It's also extensively used in the broader development community due to its efficiency and scalability.
Core Concepts of React
Components
Components are the fundamental building blocks of a React application. They are reusable pieces of UI that can represent anything from a single button to a complete webpage.
- Functional Components: These are simple JavaScript functions that return JSX, a syntax similar to HTML.
- Class Components: These components are created using ES6 classes, which allow them to have their own state and lifecycle methods. Although less commonly used now, class components are more feature-rich compared to functional components.
JSX (JavaScript XML)
JSX is a syntax extension for JavaScript that allows you to write HTML-like code inside JavaScript. It helps in defining the structure of your components clearly.
Example:
const element = <h1>Hello, world!</h1>;
JSX combines the power of JavaScript with the readability of HTML, making it easier to develop and maintain UI components.
State and Props
- State: State is an internal data structure of a component, used to hold dynamic data that can change over time.
- Props: Props (short for properties) are read-only data passed from parent to child components, allowing components to be reusable with different data inputs.
Why Choose React?
Speed and Performance
- Virtual DOM: React uses a virtual DOM, a lightweight representation of the real DOM. This allows React to update only the changed parts of the UI, making it more efficient than directly manipulating the DOM.
- Efficient Updates: React performs optimal updates by comparing the virtual DOM with the actual DOM and only applying necessary changes, preventing unnecessary re-rendering of the entire UI.
Flexibility
- Integration with Other Libraries: React can easily integrate with other JavaScript libraries or frameworks, offering flexibility for different project needs.
- Cross-Platform Development: With tools like React Native, you can build mobile applications for both iOS and Android using the same React concepts, further extending its flexibility.
Large Community and Ecosystem
React has a vast and active community that provides extensive resources, including third-party libraries and tools. From state management with Redux to routing with React Router, React’s ecosystem offers solutions for a wide range of development challenges.
How React Works
The Virtual DOM
The virtual DOM is a concept where React maintains a virtual representation of the actual DOM in memory. When a component's state changes, React first updates the virtual DOM, compares it with the real DOM, and efficiently updates only the changed elements.
Component Lifecycle
React components go through a lifecycle consisting of three main phases:
- Mounting: When the component is added to the DOM.
- Updating: When a component's state or props change, causing a re-render.
- Unmounting: When the component is removed from the DOM.
Lifecycle methods in class components (e.g., componentDidMount, componentWillUnmount) allow you to hook into these phases to perform specific actions.
Data Flow in React
React follows a unidirectional data flow model, meaning that data flows from parent to child components. This structure makes it easier to debug and maintain applications, as it enforces a clear data flow.
Creating Your First React Component
Setting Up a React Project
You can quickly set up a React project using the create-react-app tool. This tool configures everything you need to start building with React, including Webpack, Babel, and a development server.
Command:
npx create-react-app my-app
Once the setup is complete, navigate to your project directory and start the development server with:
npm start
This launches the React app in your browser with live reloading enabled, so changes automatically reflect without refreshing.
Writing Your First Component
Here’s an example of a simple functional component:
function Welcome() {
  return <h1>Hello, World!</h1>;
}
export default Welcome;
This component can be imported and used in the main App.js file like so:
import Welcome from './Welcome';

function App() {
  return (
    <div><Welcome /></div>
  );
}
export default App;
React vs. Other Frameworks
React vs. Angular
- Learning Curve: React has a smaller learning curve compared to Angular, as it’s a library focused on the view layer, while Angular is a full-fledged framework that comes with more built-in features.
- Flexibility: React offers more flexibility in choosing tools for state management, routing, and other needs, whereas Angular has an opinionated approach with built-in solutions.
React vs. Vue.js
- Community Support: React has a larger and more active community, providing a broader range of third-party libraries compared to Vue.js.
- Integration: React is easier to integrate into existing applications, whereas Vue.js is more often chosen for building new applications from scratch.
When to Choose React
- Single-Page Applications (SPAs): React is an ideal choice for SPAs where fast and interactive UIs are critical.
- Team Collaboration: React’s component-based architecture enables teams to build modular and maintainable code, making collaboration more efficient.
Getting Started with React
Installing React
To quickly set up a React project, use npx create-react-app my-app. This installs the necessary dependencies and creates a structured project with the following key folders:
- public: Contains assets like index.html.
- src: Where you write your React components and logic, including the main App.js component.
Running the Development Server
After setting up the project, you can run the development server by executing:
npm start
This opens the app in your browser with live reloading, allowing you to see changes in real time.
Creating and Rendering Components
Create a new component in the src folder, for example:
function Greeting() {
  return <h1>Welcome to React!</h1>;
}
export default Greeting;
Then, import and use it in your App.js:
import Greeting from './Greeting';

function App() {
  return (
    <div><Greeting /></div>
  );
}
export default App;
ReactJs
September 10, 2024
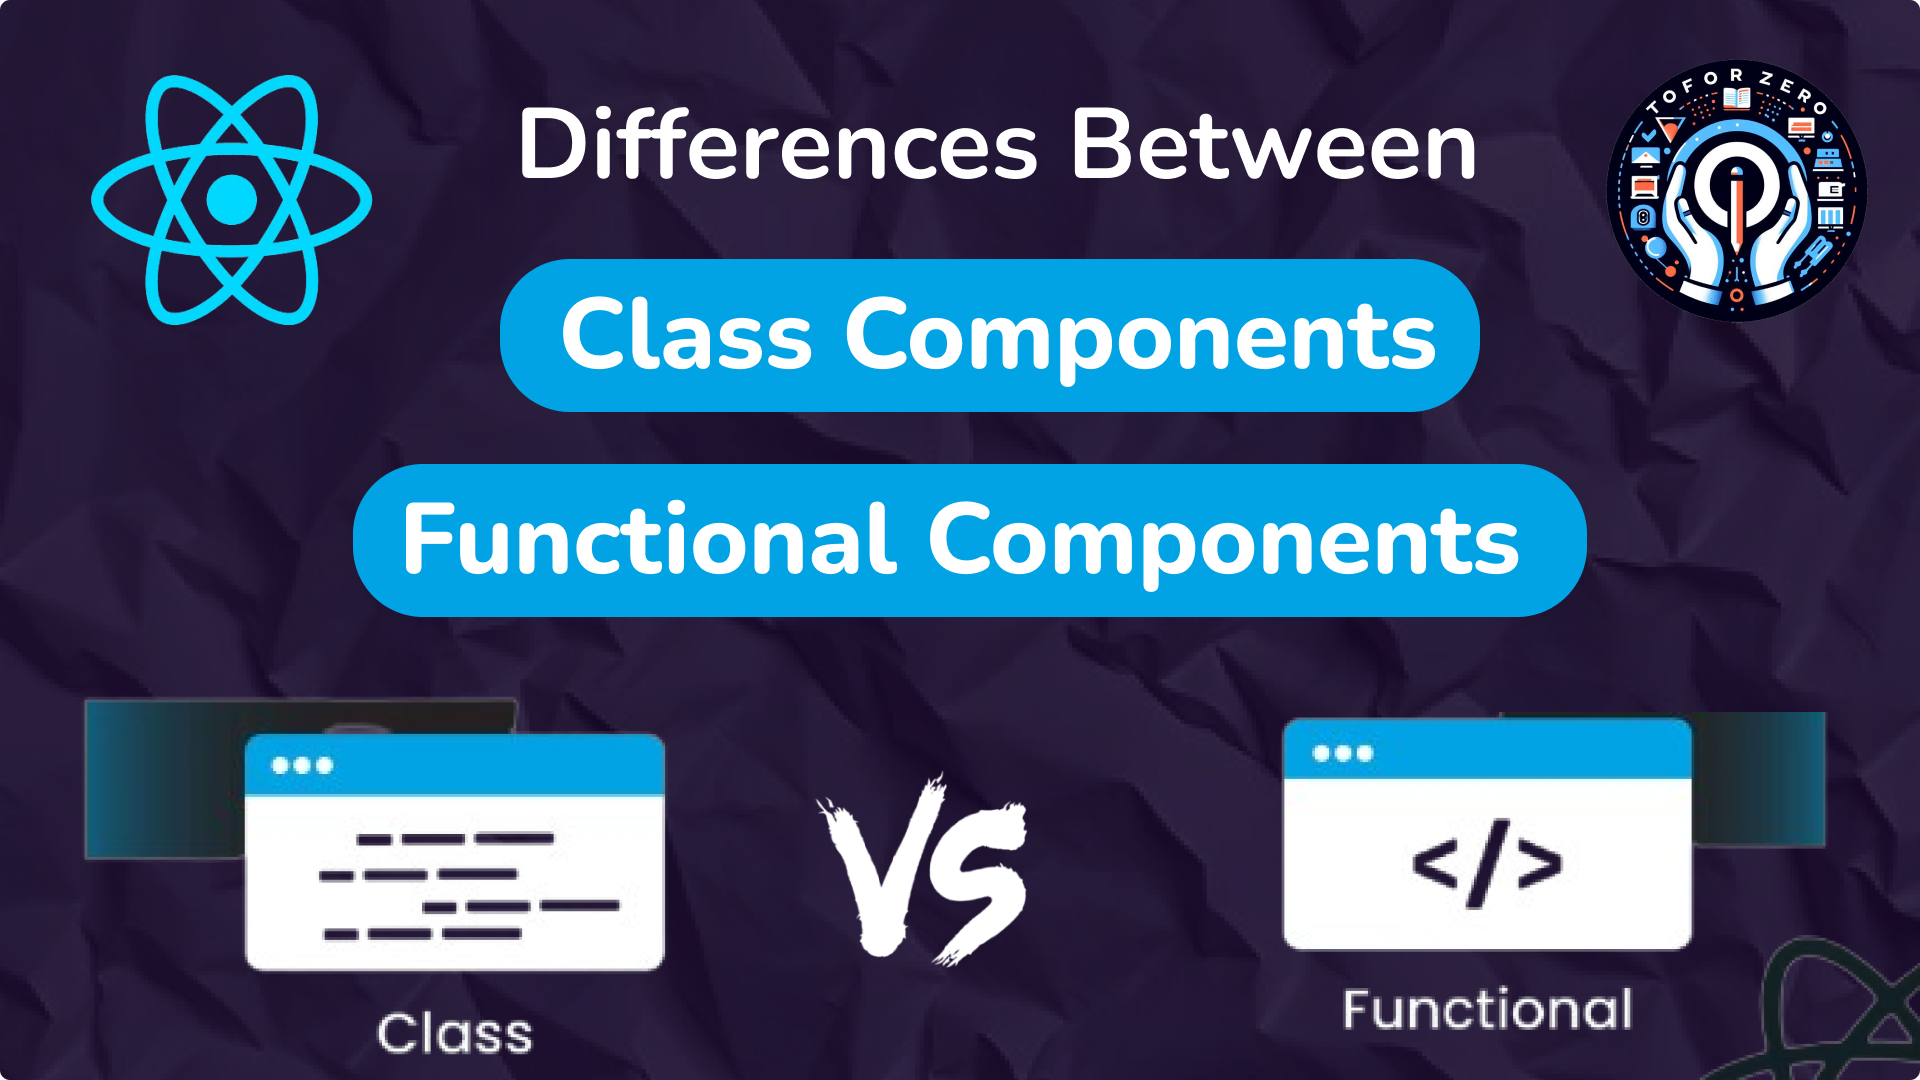
React, a popular JavaScript library for building user interfaces provides two primary ways to create components: Functional Components and Class Components. Understanding the differences between these two is crucial for React developers, especially beginners, as it helps choose the right approach for different scenarios.
What are React Components?
React components are the building blocks of any React application. They are like JavaScript functions or classes that return a part of the user interface (UI). Components are reusable and self-contained, making it easy to maintain large applications.
There are two main types of components in React:
- Functional Components
- Class Components
1. Functional Components
Functional components are simple JavaScript functions that return a React element, often using JSX (JavaScript XML). These components became more powerful with the introduction of Hooks in React 16.8, allowing them to manage state and lifecycle events.
Syntax
Here’s a basic example of a functional component:
import React from 'react';

function Greeting(props) {
  return <h1>Hello, {props.name}!</h1>;
}

export default Greeting;
Key Features
- Stateless (Before Hooks): Initially, functional components were stateless, meaning they couldn't manage their own state or use lifecycle methods.
- With Hooks: Now, with Hooks like useState and useEffect, functional components can manage state and side effects.
- Simplicity: Functional components are typically simpler and less verbose than class components.
Example with Hooks
Here’s an example that uses the useState Hook:
import React, { useState } from 'react';

function Counter() {
  const [count, setCount] = useState(0);

  return (
    <div><p>You clicked {count} times</p><button onClick={() => setCount(count + 1)}>Click me</button></div>
  );
}

export default Counter;
Explanation:
In this example, the Counter component uses the useState Hook to manage the count state. The setCount function updates the state when the button is clicked.
2. Class Components
Before Hooks, class components were the go-to method for managing state and lifecycle methods in React. They are based on ES6 classes and come with more built-in features.
Syntax
Here’s a basic example of a class component:
import React, { Component } from 'react';

class Greeting extends Component {
  render() {
    return <h1>Hello, {this.props.name}!</h1>;
  }
}

export default Greeting;
Key Features
- Stateful: Class components can manage their own state using this.state.
- Lifecycle Methods: They have access to lifecycle methods such as componentDidMount, componentDidUpdate, and componentWillUnmount.
- this Keyword: In class components, the this keyword is often used to reference the component’s state and props, which can sometimes lead to confusion or bugs.
Example with State
import React, { Component } from 'react';

class Counter extends Component {
  constructor(props) {
    super(props);
    this.state = { count: 0 };
  }

  incrementCount = () => {
    this.setState({ count: this.state.count + 1 });
  };

  render() {
    return (
      <div><p>You clicked {this.state.count} times</p><button onClick={this.incrementCount}>Click me</button></div>
    );
  }
}

export default Counter;
Explanation:
In this example, the Counter class component manages its state using this.state. The incrementCount method updates the state when the button is clicked.
Key Differences Between Functional and Class Components
1. Syntax and Structure
- Functional Components: Simple and concise, using plain JavaScript functions.
- Class Components: More verbose, requiring ES6 classes and the render method.
2. State and Lifecycle
- Functional Components: Initially stateless, but with Hooks, they can manage state and lifecycle events.
- Class Components: Stateful by default, with built-in support for lifecycle methods.
3. Performance
- Functional Components: Generally lighter and faster due to their simpler structure. With Hooks, they are more efficient in handling state.
- Class Components: May have slightly more overhead but the performance difference is often negligible.
4. Readability and Maintainability
- Functional Components: Easier to read and maintain due to their simplicity and lack of this binding issues.
- Class Components: Can become complex, especially when managing state and lifecycle methods.
When to Use Functional vs. Class Components
Functional Components
- When simplicity and ease of use are priorities.
- When using Hooks for state management and side effects.
- When performance is a concern, as functional components are generally more efficient.
Class Components
- When you need to use lifecycle methods in a more traditional way.
- When working on older projects that already use class components.
React’s Future: Moving Towards Functional Components
With the introduction of Hooks, React is shifting its focus towards functional components. Hooks provide functional components with almost all the capabilities of class components, making them the preferred choice for new applications.
Why the Shift?
- Simplicity: Functional components are easier to understand, especially for beginners.
- Consistency: Hooks bring a consistent way to handle state and side effects across all components.
- Reusability: Hooks allow for better code reuse by enabling the extraction of logic into custom Hooks.
Conclusion
Both functional and class components have their strengths. With Hooks, functional components have become more powerful, offering the same capabilities as class components while being simpler and more intuitive. For new React projects, it’s recommended to use functional components. However, understanding class components is still important, especially when working with older codebases.
ReactJs, JavaScript
September 10, 2024
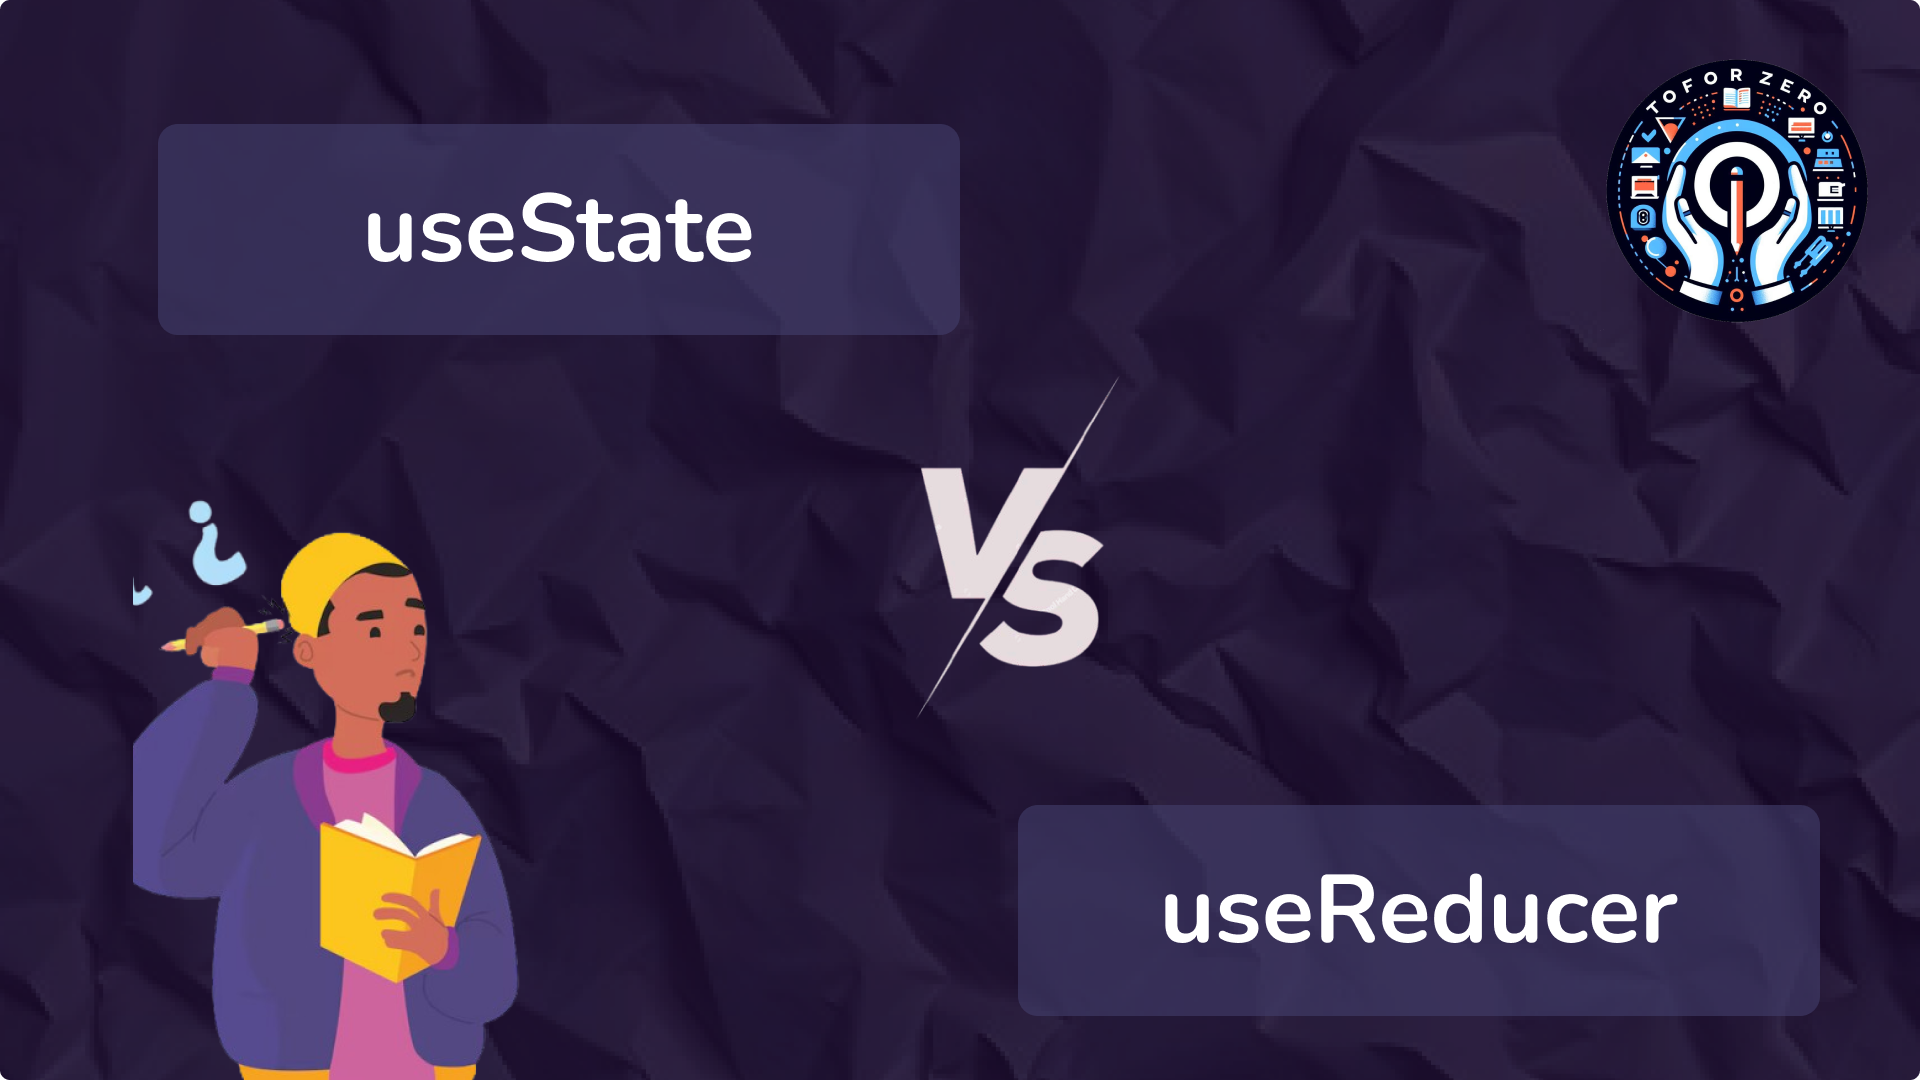
React provides two powerful hooks for managing state in functional components: useState and useReducer. While both serve the same purpose—managing state—they cater to different use cases depending on the complexity of your state and the logic behind it. In this guide, we’ll break down the differences between these hooks, their use cases, and when to use each.
What is useState?
useState is the most straightforward hook for managing simple, local state in a React component. It's perfect for scenarios where your state transitions are not too complex or dependent on multiple factors.
Basic Usage Example:
import React, { useState } from 'react';

function Counter() {
  const [count, setCount] = useState(0);

  return (
    <div><p>Count: {count}</p><button onClick={() => setCount(count + 1)}>Increment</button></div>
  );
}
Explanation:
- The useState hook initializes the count state to 0 and provides a setCount function to update that state. Each time you call setCount, the component re-renders with the new state value.
When to Use useState:
- Simple state: Ideal for managing basic states like a counter, form inputs, or a boolean toggle.
- Quick updates: When state updates are straightforward and don’t require complex logic or multiple actions.
What is useReducer?
useReducer is a more powerful hook for managing state with complex logic or multiple transitions. It is similar to how state management works in Redux, where a reducer function defines how the state changes based on actions.
Basic Usage Example:
import React, { useReducer } from 'react';

const initialState = { count: 0 };

function reducer(state, action) {
  switch (action.type) {
    case 'increment':
      return { count: state.count + 1 };
    case 'decrement':
      return { count: state.count - 1 };
    default:
      return state;
  }
}

function Counter() {
  const [state, dispatch] = useReducer(reducer, initialState);

  return (
    <div><p>Count: {state.count}</p><button onClick={() => dispatch({ type: 'increment' })}>Increment</button><button onClick={() => dispatch({ type: 'decrement' })}>Decrement</button></div>
  );
}
Explanation:
- The reducer function takes the current state and an action, and returns the new state based on the action type (increment or decrement). The dispatch function is used to send an action to the reducer, which updates the state.
When to Use useReducer:
- Complex state logic: Best when you have multiple state values or when state transitions depend on the current state.
- Multiple actions: If you need to handle multiple actions that affect the same state in different ways (e.g., increment, decrement, reset).
- Organized logic: Ideal when state transitions require more complex logic, making it easier to maintain and scale.
Key Differences Between useState and useReducer
1. When to Use
- useState: Best suited for simple, independent pieces of state like counters, form inputs, or toggles.
- useReducer: Ideal for more complex state logic, especially when multiple actions influence the state, such as in a to-do list or complex form validations.
2. State Initialization
- useState: State is initialized directly by passing the initial value as an argument, for example: useState(0).
- useReducer: State is initialized through the reducer function, using an initial state value. The syntax looks like: useReducer(reducer, initialState).
3. Updating State
- useState: You update the state using the setter function returned by useState, like setState. This is a direct, simple update mechanism.
- useReducer: State is updated by dispatching actions. You send an action object to the reducer function using dispatch, which then handles the state update based on the action.
4. Ideal For
- useState: Simple counters, form inputs, boolean toggles, or scenarios where the state is straightforward and doesn’t require complex transitions.
- useReducer: More complex state management, such as handling state with multiple sub-values or where the next state depends on the current state and action, like managing a list of todos or handling multiple form fields with validations.
5. Code Complexity
- useState: Requires minimal code. It’s easy to read and quick to implement, making it suitable for smaller, simpler components.
- useReducer: Involves more code as it requires defining a reducer function and creating action objects. While this adds complexity, it also provides more control and organization for managing state transitions.
6. State Transitions
- useState: State transitions are straightforward; you directly call the setter function to update the state, without any intermediate steps.
- useReducer: State transitions are more structured. The state change logic is centralized in the reducer function, which decides how to update the state based on the dispatched action.
When to Use useState:
1. Form Inputs:
- For managing a few form fields, useState is sufficient:
const [name, setName] = useState('');
const [email, setEmail] = useState('');
2. Toggles:
- For handling boolean toggles like showing or hiding a modal:
const [isModalOpen, setIsModalOpen] = useState(false);
3. Simple Counters:
- For managing a basic counter or simple numeric state, useState works perfectly.
When to Use useReducer:
1. Complex Forms with Validation:
- If your form has multiple fields and complex validation logic, useReducer can manage the state transitions effectively:
function formReducer(state, action) {
  // handle various actions for form management
}
2. To-Do List with Multiple Actions:
- For managing a to-do list where items can be added, removed, or toggled, useReducer organizes the logic neatly:
function todoReducer(state, action) {
  switch (action.type) {
    case 'add':
      return [...state, { id: action.id, text: action.text, completed: false }];
    case 'toggle':
      return state.map(todo => todo.id === action.id ? { ...todo, completed: !todo.completed } : todo);
    default:
      return state;
  }
}
Which One Should You Use?
Use useState when:
- The state is simple, and you only need to manage a few pieces of data.
- You don’t need to handle complex state logic or multiple actions.
- The state updates are straightforward, like a form field or a counter.
Use useReducer when:
- Your state logic is more complex and involves multiple transitions or actions.
- You need to manage a feature with many interactions, like a to-do list or shopping cart.
- You want more structure and clarity in how your state transitions occur, especially in larger components.
Conclusion
Both useState and useReducer are excellent tools for managing state in React. While useState is perfect for simpler, independent state updates, useReducer shines when dealing with more complex state logic or multiple actions. Understanding the differences between the two allows you to choose the right tool for the job, making your React components more maintainable and scalable as your application grows.
ReactJs
September 10, 2024

In React, managing form inputs is essential for creating dynamic, interactive user interfaces. There are two primary ways to handle form data: controlled components and uncontrolled components. Understanding these two approaches will help you decide which to use based on the complexity and requirements of your forms.
What Are Controlled Components?
A controlled component in React is one where the form input's value is controlled by the component’s state. React handles the input’s value, meaning any change in the input updates the React state, and any change in state updates the input value.
How Controlled Components Work:
- The input’s value is stored in the component’s state.
- When the user types, an onChange event handler is triggered.
- The event handler updates the component’s state.
- React re-renders the component with the updated state, ensuring the input value reflects the current state.
Example of a Controlled Component:
import React, { useState } from 'react';

function ControlledInput() {
  const [name, setName] = useState('');

  const handleChange = (event) => {
    setName(event.target.value);
  };

  return (
    <div><label>
        Name:
        <input type="text" value={name} onChange={handleChange} /></label><p>Your name is: {name}</p></div>
  );
}

export default ControlledInput;
Explanation:
- The value attribute of the input is tied to the component’s state (name).
- The onChange event handler updates the state whenever the user types in the input.
- React controls the input’s value, making it the "single source of truth."
What Are Uncontrolled Components?
An uncontrolled component is one where the input value is controlled by the DOM itself, rather than by React state. You use refs to directly access and retrieve the input’s value from the DOM when needed, instead of relying on React’s state to manage the value.
How Uncontrolled Components Work:
- The input’s value is controlled by the browser’s DOM.
- React’s ref attribute is used to interact with the input’s value, accessing it directly when necessary.
Example of an Uncontrolled Component:
import React, { useRef } from 'react';

function UncontrolledInput() {
  const inputRef = useRef();

  const handleSubmit = (event) => {
    event.preventDefault();
    alert(`Name: ${inputRef.current.value}`);
  };

  return (
    <div><form onSubmit={handleSubmit}><label>
          Name:
          <input type="text" ref={inputRef} /></label><button type="submit">Submit</button></form></div>
  );
}

export default UncontrolledInput;
Explanation:
- The input value is controlled by the DOM, not React state.
- The ref attribute allows direct access to the input’s value, which is retrieved when the form is submitted.
Key Differences Between Controlled and Uncontrolled Components
1. Control:
- Controlled Components: Input value is fully controlled by React state.
- Uncontrolled Components: Input value is controlled by the DOM.
2. State Updates:
- Controlled Components: Updates the component’s state on every input change, triggering a re-render.
- Uncontrolled Components: The DOM handles the input value, and there is no need to update the state unless you explicitly request the input’s value.
3. Accessing Value:
- Controlled Components: Access input values from React’s state.
- Uncontrolled Components: Access input values using refs (direct DOM access).
4. Use Cases:
- Controlled Components: Best for forms with complex validation, real-time data syncing, or interactions with other components.
- Uncontrolled Components: Suitable for simple forms that don’t need frequent re-renders or complex logic.
5. Validation:
- Controlled Components: Easier to validate because form data is available through state.
- Uncontrolled Components: Harder to validate without bringing the form data into React’s state.
6. Re-rendering:
- Controlled Components: The component re-renders with every input change.
- Uncontrolled Components: Avoids re-renders unless explicitly required, which can improve performance in simple forms.
When to Use Controlled Components?
- Complex Forms: If your form requires advanced validation or dynamic changes (e.g., error messages as the user types), controlled components offer better control.
- Real-Time Data Sync: When input data needs to be synced or displayed in real-time, controlled components make it easier to manage.
- Input Dependencies: When inputs depend on each other (e.g., dropdowns where one selection changes the options available in another), controlled components make it easier to manage relationships.
Advantages of Controlled Components:
- Full control over input values.
- Easier to implement real-time validation and conditional rendering.
- Centralized state management for better organization and scalability.
When to Use Uncontrolled Components?
- Simple Forms: If the form is basic (e.g., collecting input and submitting it without much interaction or validation), uncontrolled components can simplify your code.
- Performance: Uncontrolled components reduce unnecessary re-renders, which can help improve performance in certain cases.
- Third-Party Integration: When working with non-React libraries that directly manipulate the DOM, uncontrolled components may be more suitable.
Advantages of Uncontrolled Components:
- Less code for simple forms.
- Fewer re-renders, improving performance in forms that don’t require constant updates.
- Easier integration with external libraries that use direct DOM manipulation.
Conclusion
Both controlled and uncontrolled components have their place in React. Controlled components provide more flexibility and are ideal for forms that need validation, dynamic behavior, or real-time data syncing. On the other hand, uncontrolled components are simpler to implement and perform better in forms that don’t require constant updates or validation.
ReactJs, JavaScript
September 10, 2024
State management is a critical aspect of React development, particularly in large and complex applications. Two popular approaches to handling global state in React are the Context API and Redux. While both are widely used, they have distinct purposes and advantages. This guide will help you understand their differences, use cases, and when to use each.
What is Context API?
The Context API is a built-in feature in React that allows you to share state across the entire component tree without needing to "prop drill" (passing props down through multiple levels). It’s lightweight and ideal for scenarios where global state sharing is needed without external libraries.
Use Cases for Context API:
- Sharing theme data (e.g., dark/light mode).
- Managing user authentication.
- Passing down configuration settings.
How Context API Works:
- Provider: The Provider component wraps the part of the app that needs access to the shared state and supplies it to all child components.
- Consumer: Components that need access to the shared state use the useContext hook to consume the data.
Example of Using the Context API:
import React, { createContext, useState, useContext } from 'react';

// Create a context
const UserContext = createContext();

function App() {
  const [user, setUser] = useState({ name: 'John Doe', age: 25 });

  return (
    // Provide the user data to child components<UserContext.Provider value={user}><Profile /></UserContext.Provider>
  );
}

function Profile() {
  // Consume the user data using useContextconst user = useContext(UserContext);return <div>Name: {user.name}, Age: {user.age}</div>;
}
Pros of Context API:
- Simplicity: It’s easy to set up since it’s built into React.
- Lightweight: Perfect for small to medium-sized applications that don’t require complex state management.
- No Additional Dependencies: Being part of React, there’s no need to install extra libraries.
Cons of Context API:
- Not Ideal for Large Applications: As state management becomes more complex, the Context API can become harder to maintain.
- Potential Performance Issues: Updates to the context can cause unnecessary re-renders of child components.
- Lack of Middleware Support: There’s no native support for middleware like Redux, making it more difficult to handle asynchronous actions.
What is Redux?
Redux is a powerful, external state management library often used in large and complex applications. It provides a single, centralized store where all state is managed globally. Redux adheres to strict principles like:
- Single Source of Truth: All the state lives in one place (the store).
- Actions: Represent events that cause state changes.
- Reducers: Pure functions that determine how the state changes in response to actions.
Example of How Redux Works:
import { createStore } from 'redux';

// Define initial state
const initialState = {
  count: 0,
};

// Create a reducer function
function counterReducer(state = initialState, action) {
  switch (action.type) {
    case 'INCREMENT':
      return { ...state, count: state.count + 1 };
    case 'DECREMENT':
      return { ...state, count: state.count - 1 };
    default:
      return state;
  }
}

// Create a Redux store
const store = createStore(counterReducer);

// Dispatch actions to change the state
store.dispatch({ type: 'INCREMENT' });
console.log(store.getState()); // Output: { count: 1 }
Pros of Redux:
- Centralized State Management: All the state is managed in a single store, making it easier to maintain and reason about.
- Predictable State Updates: State updates follow a strict flow via actions and reducers.
- Middleware Support: Redux can handle complex asynchronous operations with middleware like Redux Thunk or Redux Saga.
- DevTools Integration: Redux comes with powerful debugging tools like Redux DevTools, making it easier to track every state change.
- Scalable: Redux is well-suited for large, complex applications.
Cons of Redux:
- Boilerplate Code: Setting up Redux can involve a lot of code, including actions, reducers, and managing the store.
- Steeper Learning Curve: Redux can be more difficult for beginners to grasp compared to the Context API.
- External Dependency: Redux requires installing and maintaining additional libraries, unlike the Context API, which is built into React.
When to Use Context API vs. Redux
When to Use Context API:
- Small to Medium-Sized Applications: If your app is not too complex and only needs to share a few pieces of state (e.g., theme, user authentication), the Context API is a simple and effective choice.
- Local State Management: For cases where state is only needed by a few components and doesn’t involve complex logic.
- Minimizing Dependencies: If you prefer not to introduce additional libraries, the Context API is already included with React.
When to Use Redux:
- Large or Complex Applications: If your app manages a lot of global state or needs to frequently share state across deeply nested components, Redux is a more scalable solution.
- Handling Asynchronous Actions: Redux’s middleware capabilities make it easier to manage complex asynchronous actions like API calls.
- Predictable State Updates: When you need strict control over how state is updated and propagated throughout your application.
Key Differences Between Context API and Redux
1. Setup
- Context API: Since it's built into React, setting up the Context API is straightforward and requires no additional installation.
- Redux: Setting up Redux requires installing additional libraries and creating actions, reducers, and a store, which can feel cumbersome in comparison.
2. Purpose
- Context API: Primarily used for simple state sharing between components, such as passing theme data or user information across the app.
- Redux: Designed for more complex state management, where having a centralized state across the entire application is beneficial.
3. Performance
- Context API: In larger apps, performance issues can arise since updating the context may trigger re-renders across many components unnecessarily.
- Redux: Redux is optimized for large applications, minimizing unnecessary re-renders by using a more efficient update pattern.
4. Boilerplate
- Context API: Requires minimal code. You mainly set up a provider and consume the context where needed.
- Redux: Involves more boilerplate code. You need to create actions, reducers, and manage a central store, which adds complexity to the codebase.
5. Middleware Support
- Context API: There is no native support for middleware, making handling asynchronous actions, like API requests, more difficult.
- Redux: Redux supports middleware (e.g., Redux Thunk, Redux Saga) which makes handling asynchronous logic much easier.
6. DevTools
- Context API: Does not come with any built-in tools for state debugging or tracking.
- Redux: Comes with Redux DevTools, a powerful tool that allows you to inspect every state change, action, and time-travel debug your application.
7. Best For
- Context API: Ideal for small to medium-sized applications where state management is relatively simple, and the state only needs to be shared between a few components.
- Redux: Best suited for large and complex applications where state management needs to be predictable, centralized, and efficient across many components.
Conclusion
Both Context API and Redux are valuable tools for state management in React, but they cater to different needs:
- Use the Context API when working on small to medium-sized applications where state is limited and does not require complex logic.
- Opt for Redux in large, complex applications where a centralized state, strict state updates, and robust debugging tools are necessary.
ReactJs
September 10, 2024

The Effect Hook, commonly referred to as useEffect, is one of the most powerful and frequently used hooks in React. It allows function components to perform side effects such as fetching data, updating the DOM, and setting up timers. Mastering useEffect is key for managing these external interactions effectively in React applications.
1. What is a Side Effect?
In React, a side effect refers to any operation that affects something outside the scope of the function being executed. React components are pure functions by default, meaning they return a React element based solely on their props and state. However, side effects introduce behavior that interacts with the external environment. Common examples include:
- Fetching data from an API
- Direct DOM manipulation
- Subscribing to events or setting up timers
- Logging or updating the document title
2. Introducing useEffect
The useEffect Hook allows you to perform side effects in your components and acts as a combination of lifecycle methods (componentDidMount, componentDidUpdate, and componentWillUnmount) in React class components.
Basic Syntax:
useEffect(() => {
  // Side effect logic here
});
Example: Updating the Document Title
import React, { useEffect, useState } from 'react';

function Counter() {
  const [count, setCount] = useState(0);

  useEffect(() => {
    document.title = `You clicked ${count} times`;
  }, [count]); // The effect depends on the 'count' state

  return (
    <div><p>You clicked {count} times</p><button onClick={() => setCount(count + 1)}>
        Click me
      </button></div>
  );
}

export default Counter;
Explanation:
- useEffect Hook: By default, useEffect runs after every render.
- Dependency Array: The second argument ([count]) ensures the effect only runs when count changes, preventing unnecessary executions.
3. Common Use Cases for useEffect
3.1. Fetching Data
A common use of useEffect is to fetch data when a component mounts.
useEffect(() => {
  fetch('https://jsonplaceholder.typicode.com/posts')
    .then(response => response.json())
    .then(data => setPosts(data));
}, []); // Empty array means this runs only once after the initial render
3.2. Subscribing to Events
Set up event listeners, like resizing the window or handling real-time events.
useEffect(() => {
  const handleResize = () => {
    console.log(window.innerWidth);
  };

  window.addEventListener('resize', handleResize);

  return () => {
    window.removeEventListener('resize', handleResize); // Cleanup on unmount
  };
}, []);
3.3. Timers
You can use useEffect to set up timers or intervals.
useEffect(() => {
  const interval = setInterval(() => {
    console.log('This runs every second');
  }, 1000);

  return () => clearInterval(interval); // Cleanup the interval on unmount
}, []);
4. Cleanup Function
Many side effects, such as event listeners or timers, require cleanup to prevent memory leaks. useEffect can return a cleanup function that runs when the component unmounts or before re-running the effect.
Example: Cleanup in useEffect
useEffect(() => {
  const subscription = someAPI.subscribe(() => {
    // Handle subscription
  });

  return () => {
    subscription.unsubscribe(); // Cleanup when component unmounts
  };
}, []);
Why Cleanup is Important:
- Avoid Memory Leaks: Without cleanup, event listeners, subscriptions, or intervals may persist even after the component is removed.
- Ensure Consistency: Proper cleanup prevents multiple subscriptions or intervals from running, avoiding unexpected behavior.
5. useEffect Dependencies
The dependency array controls when the effect runs. It tells React to re-run the effect only when one or more dependencies have changed.
Dependency Scenarios:
- No Dependencies: The effect runs after every render.
useEffect(() => {
  // Runs after every render
});
- Empty Dependency Array: The effect runs only once after the initial render.
useEffect(() => {
  // Runs once, after the initial render
}, []);
- Specific Dependencies: The effect runs when any dependency changes.
useEffect(() => {
  // Runs when 'prop' or 'state' changes
}, [prop, state]);
Common Pitfalls:
- Missing Dependencies: Forgetting to include dependencies can result in stale state or closures.
- Over-Including Dependencies: Including unnecessary dependencies can cause the effect to re-run more often than needed.
6. Advanced Patterns with useEffect
Conditional Effects
Sometimes, you only want the effect to run under certain conditions.
useEffect(() => {
  if (shouldFetch) {
    fetchData();
  }
}, [shouldFetch]); // Effect runs only if 'shouldFetch' is true
Handling Multiple Effects
If you have multiple side effects, separate them into individual useEffect calls for better maintainability.
useEffect(() => {
  // Effect 1: Fetch data
}, [dependency1]);

useEffect(() => {
  // Effect 2: Subscribe to an event
}, [dependency2]);
7. Debugging useEffect
Common Issues:
- Infinite Loops: Occurs when an effect modifies a dependency it listens to, causing it to re-run continuously.
- Stale Closures: This happens when an effect references outdated values or variables due to missing dependencies.
Tools and Techniques:
- Linting: Use ESLint's eslint-plugin-react-hooks to catch dependency issues.
- Console Logs: Add console.log statements to track when and why effects are running.
ReactJs
September 11, 2024
Server-Side Rendering (SSR) with React
Server-side rendering (SSR) is a technique where the server renders the initial HTML of a page instead of the client (browser). In React applications, SSR can significantly improve performance, SEO, and user experience. Let's dive into the basics of SSR with React to understand its importance and how to implement it.
1. What is Server-Side Rendering (SSR)?
In a typical React application, rendering happens on the client-side. The browser downloads an initial HTML file, then renders the rest of the content via JavaScript. While this method works well for many apps, it can delay when content becomes visible to users and negatively impact SEO since search engines might not fully execute JavaScript.
SSR changes this by rendering the HTML content on the server before sending it to the client. When a user requests a page, the server sends back a fully-rendered HTML page, which can be displayed immediately. The React code is then "rehydrated" on the client-side, making the page interactive.
2. Why Use SSR?
- Improved SEO: SSR enables search engines to easily crawl and index your site since content is rendered as static HTML.
- Faster Initial Load: Users see the content faster because the HTML is pre-rendered, improving the time-to-first-byte (TTFB).
- Better User Experience: Users, especially those on slower networks or devices, experience faster content delivery and interaction.
3. Setting Up SSR in React
To implement SSR in React, you can use frameworks like Next.js, which simplifies the process. However, let's look at a basic implementation using Node.js and Express to understand how SSR works under the hood.
a. Basic SSR with React and Express
Start by creating a new React app:
npx create-react-app my-ssr-app

cd my-ssr-app
Next, install the required dependencies:
npm install express react-dom/server
Now, set up an Express server to render your React app on the server-side:
// server.js
const express = require('express');
const path = require('path');
const fs = require('fs');
const React = require('react');
const ReactDOMServer = require('react-dom/server');
const App = require('./src/App').default;

const app = express();

app.use(express.static(path.resolve(__dirname, 'build')));

app.get('*', (req, res) => {
  const app = ReactDOMServer.renderToString(React.createElement(App));

  const indexFile = path.resolve('./build/index.html');
  fs.readFile(indexFile, 'utf8', (err, data) => {
    if (err) {
      console.error('Error:', err);
      return res.status(500).send('An error occurred');
    }

    return res.send(
      data.replace('<div id="root"></div>', `<div id="root">${app}</div>`)
    );
  });
});

app.listen(3000, () => {
  console.log('Server is running on port 3000');
});
How It Works:
- Express Server: Hosts static files and manages the incoming requests.
- ReactDOMServer.renderToString: Renders the React component tree into a static HTML string.
- HTML Replacement: The rendered HTML replaces the placeholder <div id="root"></div> in the index.html file.
b. Running the Server
To serve the SSR version of your React app:
npm run build

node server.js
This renders your React app on the server and sends a fully-rendered HTML page to the client.
4. Using Next.js for SSR
If you're looking for an easier and more scalable way to implement SSR, Next.js is a popular framework that offers built-in support for SSR, static site generation (SSG), and routing. Here’s how to get started:
npx create-next-app@latest my-next-app

cd my-next-app
Next.js automatically handles SSR for all pages. For example, creating a simple SSR page is as easy as:
// pages/index.js
export default function Home() {
  return (
    <div><h1>Welcome to Next.js with SSR</h1></div>
  );
}
Run the app using npm run dev, and Next.js will server-render your page out of the box.
5. Pros and Cons of SSR
Pros:
- SEO Friendly: Helps improve search engine rankings by serving fully-rendered HTML.
- Performance: Faster initial load times as the server sends the HTML.
- User Experience: Better for users with slower devices or networks as they see content faster.
Cons:
- Increased Complexity: SSR can be more complex to set up and maintain compared to client-side rendering.
- Server Load: Since rendering happens on the server, it increases server workload.
- Latency: Adds a server round-trip, which can introduce some latency.
6. When to Use SSR?
SSR is beneficial in scenarios where SEO and initial load performance are critical. Some examples include:
- E-commerce websites: Where fast load times and SEO are essential to conversion rates.
- Blogs or content-heavy sites: To ensure search engines index content effectively.
- News websites: For faster content delivery to users.
However, not all applications need SSR. Apps that are highly interactive, real-time, or less dependent on SEO may not benefit as much from SSR.
ReactJs, JavaScript, Web
September 11, 2024

Once your React app is complete, the next step is making it accessible online. This guide will walk you through the deployment process using two popular methods: GitHub Pages and Netlify. Before deploying, we’ll first prepare your React app for production.
1. Building Your React App for Production
Before deploying, you need to create a production-ready build of your React app. Here’s how to do it:
Navigate to Your App Folder
- Open your terminal (Command Prompt, Git Bash, etc.).
- Use the cd command to navigate to your React app’s directory:
C:\Users\YourName>cd your-app-name
Run the Build Command
Once inside your app’s folder, run the following command to create an optimized production build:
C:\Users\YourName\your-app-name>npm run build
This command generates a build folder containing the minified and optimized version of your app.
What Happens After the Build?
- The build folder will include the necessary files (HTML, CSS, JavaScript) optimized for deployment.
- These files are ready to be uploaded to a hosting service, where they can be accessed via a browser.
2. Deploying Your React App on GitHub Pages
GitHub Pages is a simple way to host static websites directly from your GitHub repositories. Follow these steps to deploy your React app on GitHub Pages:
Create a GitHub Repository
- Go to GitHub and create a new repository.
- Name the repository (e.g., my-app) and initialize it without a README or any other files.
Push Your Code to GitHub
1. In your terminal, initialize Git in your project folder if you haven’t done so:
git init
2. Add all files and commit them:
git add .

git commit -m "First commit"
3. Link your local repository to the GitHub remote:
git remote add origin https://github.com/yourusername/my-app.git

git push -u origin master
Enable GitHub Pages
- In your GitHub repository, go to the Settings tab.
- Scroll down to the GitHub Pages section.
- Select the gh-pages branch (if you’ve created one) or let GitHub handle the build.
- GitHub will provide you with a live URL for your site.
3. Deploying Your React App on Netlify
Netlify is a popular platform for hosting static websites (like React apps) and offers seamless integration with GitHub for automatic deployment.
Build Your React App
Make sure you have already created the production build of your app by running:
npm run build
Sign Up for Netlify
- Go to Netlify and create a free account.
Deploy Your React App
Option 1: Drag and Drop Deployment
- Once logged in, simply drag and drop your build folder into the Netlify dashboard.
- Netlify will instantly deploy your app and provide a live link.
Option 2: Deploy via GitHub
- In Netlify, select the New Site from Git option.
- Connect your GitHub account and select your repository.
- Netlify will automatically build and deploy your React app whenever you push new code to GitHub.
Set Build Command and Publish Directory
When configuring your deployment settings, use the following:
- Build Command: npm run build
- Publish Directory: build
Your App is Live!
After Netlify finishes building, your React app will be live at a URL provided by Netlify.
ReactJs, JavaScript, Web
September 11, 2024

CSS Variables (Custom Properties): A Powerful Tool for Reusable and Dynamic Styling
CSS Variables, also known as Custom Properties, provide a flexible way to manage and reuse values across your stylesheets. They can significantly improve the maintainability and scalability of your CSS, particularly in large projects. Let’s explore the advantages and practical uses of CSS Variables.
Why Use CSS Variables?
- Reusability: Define values once and reuse them throughout your CSS.
- Maintainability: Easily update values in a single place, reducing repetitive edits.
- Theming: Efficiently create and switch between themes by modifying variables.
1. Defining and Using Variables
CSS Variables follow a simple syntax and can be applied globally or within specific scopes.
Defining a Variable
You define a variable using the -- prefix, and variables are typically declared in the :root selector, which applies them globally.
:root {
    --main-color: #3498db;
    --padding-size: 10px;
}
- --main-color: Holds a color value (#3498db).
- --padding-size: Stores a size value (10px).
By defining these variables in :root, they can be accessed throughout your entire stylesheet.
Using a Variable
To use a variable, the var() function is applied in your CSS rules.
.box {
    background-color: var(--main-color);
    padding: var(--padding-size);
}
Here, the background color and padding of the .box element are dynamically set using the values stored in the variables. If you need to change the color or padding later, you simply update the variables in :root.
2. Overriding Variables
CSS Variables offer the ability to override their values within specific contexts, such as when applying themes.
:root {
    --main-color: #3498db;
    --padding-size: 30px;
}

.dark-theme {
    --main-color: #2c3e50;
    --text-color: #ffffff;
}

.box {
    background-color: var(--main-color);
    padding: var(--padding-size);
    color: var(--text-color);
}
When the .dark-theme class is applied, the --main-color changes to a darker shade (#2c3e50), and --text-color becomes white. This dynamic behavior is particularly useful when building light/dark themes for your application.
- CSS Variables bring flexibility, reusability, and theming capabilities to your stylesheets. By understanding how to define, use, and override them, you can streamline the development process and manage your styles more efficiently, especially as your project grows in size and complexity.
CSS
September 11, 2024
- Have you ever been working on a project and thought, "There must be an easier way to do this!" When building apps with React (a popular tool for creating websites and apps), Hooks are like your secret weapon. They make things easier, cleaner, and more fun. But what exactly are these React Hooks? And why are they such a big deal?
- Let’s dive into the world of React Hooks and break it down with some real-world examples (with plenty of emojis to keep it fun!). 😄
🚀 What Are React Hooks?
- In simple terms, React Hooks are special functions in React that allow you to use powerful features—like handling your app's state or reacting to changes—without writing complicated code. Before Hooks, developers had to use something called "class components" to do this, which could get messy.
- Hooks give you all the good stuff in a way that's easy to manage. 🧠
🔍 Why Are They Important?
Hooks are like the Swiss army knife of React—they simplify complex tasks! Think of them as tools that help your app "remember" things and "react" when changes happen. For example:
- 💡 Want to remember a user’s name while they're navigating your site? Hooks can do that!
- 📱 Need to update content on a page when something changes? Hooks can do that, too!
- Hooks let you avoid long, repetitive code, making your app cleaner and faster to build.
🏡 Real-Life Example: Hooks in Action
Let’s imagine your home has a smart light system. You want the lights to turn on when you clap your hands and turn off when you clap again. In this case, your house is like a React app, and the lights are controlled by Hooks!
Here’s how React Hooks would handle this:
- Clap once—the hook stores that "on" state, so the lights turn on.
- Clap again—the hook updates to "off," and the lights turn off.
It "remembers" what happened last (on or off) and changes things when you clap!
🧑💻 A Simple Code Example 🎉
Now that you’ve seen the analogy, let's look at a simple code example using useState, one of the most popular hooks:
import React, { useState } from 'react';

function ClapLights() {
  // This is the "Hook" that remembers if the lights are on or offconst [lightsOn, setLightsOn] = useState(false);

  const handleClap = () => {
    setLightsOn(!lightsOn); // Toggle between on and off
  };

  return (
    <div><h1>{lightsOn ? '💡 Lights are ON!' : '🌑 Lights are OFF!'}</h1><button onClick={handleClap}>👏 Clap to Toggle Lights</button></div>
  );
}

export default ClapLights;
🤔 What's Happening Here?
- useState(false) — We start with the lights off. The useState hook gives us two things: the current state (lightsOn) and a way to update it (setLightsOn).
- handleClap() — This function is called when you "clap" (i.e., click the button). It flips the light state from true to false or vice versa.
- The UI (user interface) updates automatically when the state changes, showing either "💡 Lights are ON!" or "🌑 Lights are OFF!"
- This is the magic of Hooks—they make it easy to remember, update, and react to state changes. 🧙♂️
🔄 Another Everyday Hook: useEffect
- Now, let’s imagine you’re cooking with a smart kitchen timer. When you start boiling water, you want the timer to start, and when the water reaches the boiling point, you want an alert to tell you it’s time to add your pasta. This is where the useEffect hook shines! It watches for changes and reacts when something happens.
- In React, useEffect is perfect for scenarios where something needs to happen when the app first loads or when something changes, like setting a timer or fetching new data. ⏲️
🕰️ Code Example Using useEffect:
  import React, { useState, useEffect } from 'react';
  function KitchenTimer() {
    const [timer, setTimer] = useState(0); // Initial timer value     // Hook to simulate timer running every second
    useEffect(() => {
      const interval = setInterval(() => {
        setTimer((prevTimer) => prevTimer + 1);
      }, 1000);
      // Cleanup to stop timer when component is unmounted
      return () => clearInterval(interval);
    }, []); // Empty array means this effect runs only once (when the component mounts)
    return (
      <div>
        <h1>⏲️ Timer: {timer} seconds</h1>
      </div>
    );
  }
export default KitchenTimer;
🔑 What’s Happening Here?
- useEffect(() => {...}, []) — This hook runs some code (setting the timer) every second. The empty array [] means it only runs once when the component first shows up on the page.
- The clearInterval cleans up the timer to stop it when the component is no longer being used, preventing a runaway timer. 🚀
🎯 Wrapping It Up: Why Hooks Are Game-Changers
React Hooks are like personal assistants for your app—they help it remember things, react to changes, and make your code much easier to manage! Here’s why they’re awesome:
- Simplicity: Hooks make your app's code shorter and easier to follow. 🧼
- Efficiency: They eliminate the need for long and messy code.
- Flexibility: They let you easily manage and update the state of your app or watch for changes. 🎛️
By using Hooks like useState and useEffect, you can make your app smarter, cleaner, and more responsive. And the best part? They’re easy to understand—even for non-developers! 🎉
So, next time you're building an app or website, just remember—Hooks are your friends! 😊🎣
Happy coding! 💻✨
ReactJs, JavaScript, Web
September 12, 2024